Fullmeals
HomeExploreCreatorsPantry MatchSurprise Me
HomeExploreCreatorsPantry MatchSurprise MeShopping ListMy Favorites
Fullmeals

Fullmeals helps you cook without watching by converting cooking videos into simple, step-by-step recipes designed for real kitchens.

cook@fullmeals.com

Quick Links

  • How it Works
  • Categories
  • Explore Recipes
  • RSS Feed

Legal

  • Terms of Use
  • Privacy Policy

© 2026 Fullmeals. All rights reserved.

Fullmeals

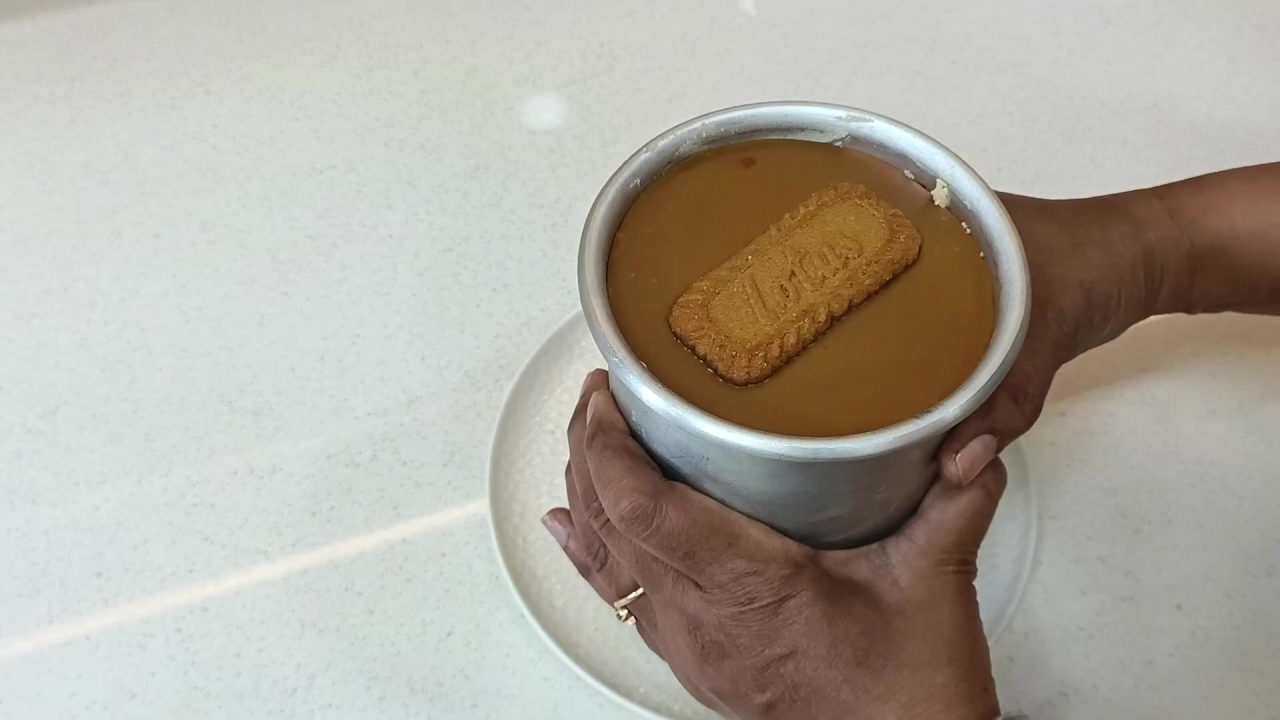
No-Bake Biscoff Cheesecake with Homemade Cream Cheese

Recipe by Healthy Recipes Home by Malika Khurana
  • Ready in840 min
  • Prep30 min
  • Cook10 min
  • CuisineEuropean · Belgian
  • Serves4 People
  • Calories~450 kcal
No-Bake Biscoff Cheesecake with Homemade Cream Cheese

Ingredients

For Homemade Cream Cheese

  • 1 litreMilk (full cream)
  • 1 tbspVinegar
  • 1 tbspWater
  • 1 pinchSalt

For Biscoff Biscuit Base

  • 7Biscoff biscuits
  • 2 tspGhee (melted)

For Cheesecake Filling & Topping

  • 1/4 cupWhipping cream (non-dairy)
  • 4 tbspBiscoff spread
  • 1 tbspPowdered sugar

Step-by-Step Instructions

  1. 1.Prepare Homemade Cream Cheese

    Pour 1 liter of full-fat milk into a pot (add a little water to the pot first to prevent sticking). Place it on the stove and bring to a boil over high heat. While the milk boils, prepare the vinegar mixture by combining 1 tablespoon of vinegar with 1 tablespoon of water in a separate bowl. Once the milk boils, turn off the flame and let it cool for 30-60 seconds.

  2. 2.Curdle Milk and Strain Paneer

    Gradually add the diluted vinegar mixture to the milk while continuously stirring. Continue adding until the milk curdles and the yellowish whey separates from the paneer. Place a sieve over a pot and line it with a clean cloth. Pour the curdled milk into the cloth to separate the paneer from the whey water. Let the paneer cool down completely.

  3. 3.Prepare Biscoff Biscuit Base

    Take 7 Biscoff biscuits and crush them into a fine powder using a mixer grinder. Transfer the biscuit powder to a mixing bowl. Add 2 teaspoons of melted ghee (or butter) to the biscuit powder and mix well until it resembles wet sand and binds together when pressed.

  4. 4.Form the Biscuit Layer

    Pour the prepared biscuit mixture into a loose-bottom cake tin. Spread the mixture evenly across the bottom of the tin using a spoon. Use a flat-bottomed glass or a similar tool to firmly press down the biscuit layer, ensuring it is compact and well-set. Place the mold in the refrigerator for 15-20 minutes to allow the biscuit base to set properly.

  5. 5.Whip the Cream

    Take 1/4 cup of non-dairy whipping cream. Ensure the cream is cold (if stored in the freezer, thaw it in the refrigerator 1-2 days prior). Whip the cream using an electric whisk until stiff peaks form. (If using a hand whisk, it will take longer). Invert the bowl to check if the cream holds its shape, indicating it's perfectly whipped.

  6. 6.Prepare Cream Cheese for Filling

    Take the cooled paneer and place it into the mixer grinder jar (the same one used for biscuits is fine). Add a pinch of salt. Blend the paneer on pulse mode (run for a few seconds, then stop, repeat 2-3 times) until it achieves a smooth texture. Avoid over-blending. If the mixture appears too dry, add 1-2 spoons of the reserved whey water. The resulting cream cheese should be approximately 1/2 cup.

  7. 7.Melt Biscoff Spread

    Take 2 tablespoons of Biscoff creamy spread and place it in a microwave-safe bowl. Microwave for 30 seconds until it is melted and smooth.

  8. 8.Combine Filling Ingredients

    To the whipped cream, add the melted Biscoff spread, 1 tablespoon of powdered sugar (optional), and the freshly made cream cheese. Gently mix all the ingredients using a cut-and-fold method with a spatula. Do not overmix, as this can cause the mixture to curdle.

  9. 9.Assemble the Cheesecake Layers

    Retrieve the cake tin with the set biscuit base from the refrigerator. Pour the prepared cream cheese filling mixture over the biscuit base. Gently tap the tin a few times to ensure the filling settles evenly. Place the tin back into the refrigerator for at least 30 minutes to allow the cream cheese layer to set.

  10. 10.Add Topping and Chill Overnight

    After the cream cheese layer has set (check by lightly touching it with a finger), pour the remaining 2 tablespoons of melted Biscoff spread evenly over the top. Place one whole Biscoff biscuit on top for garnish. Refrigerate the cheesecake overnight for optimal setting and flavor development.

  11. 11.Demold and Serve

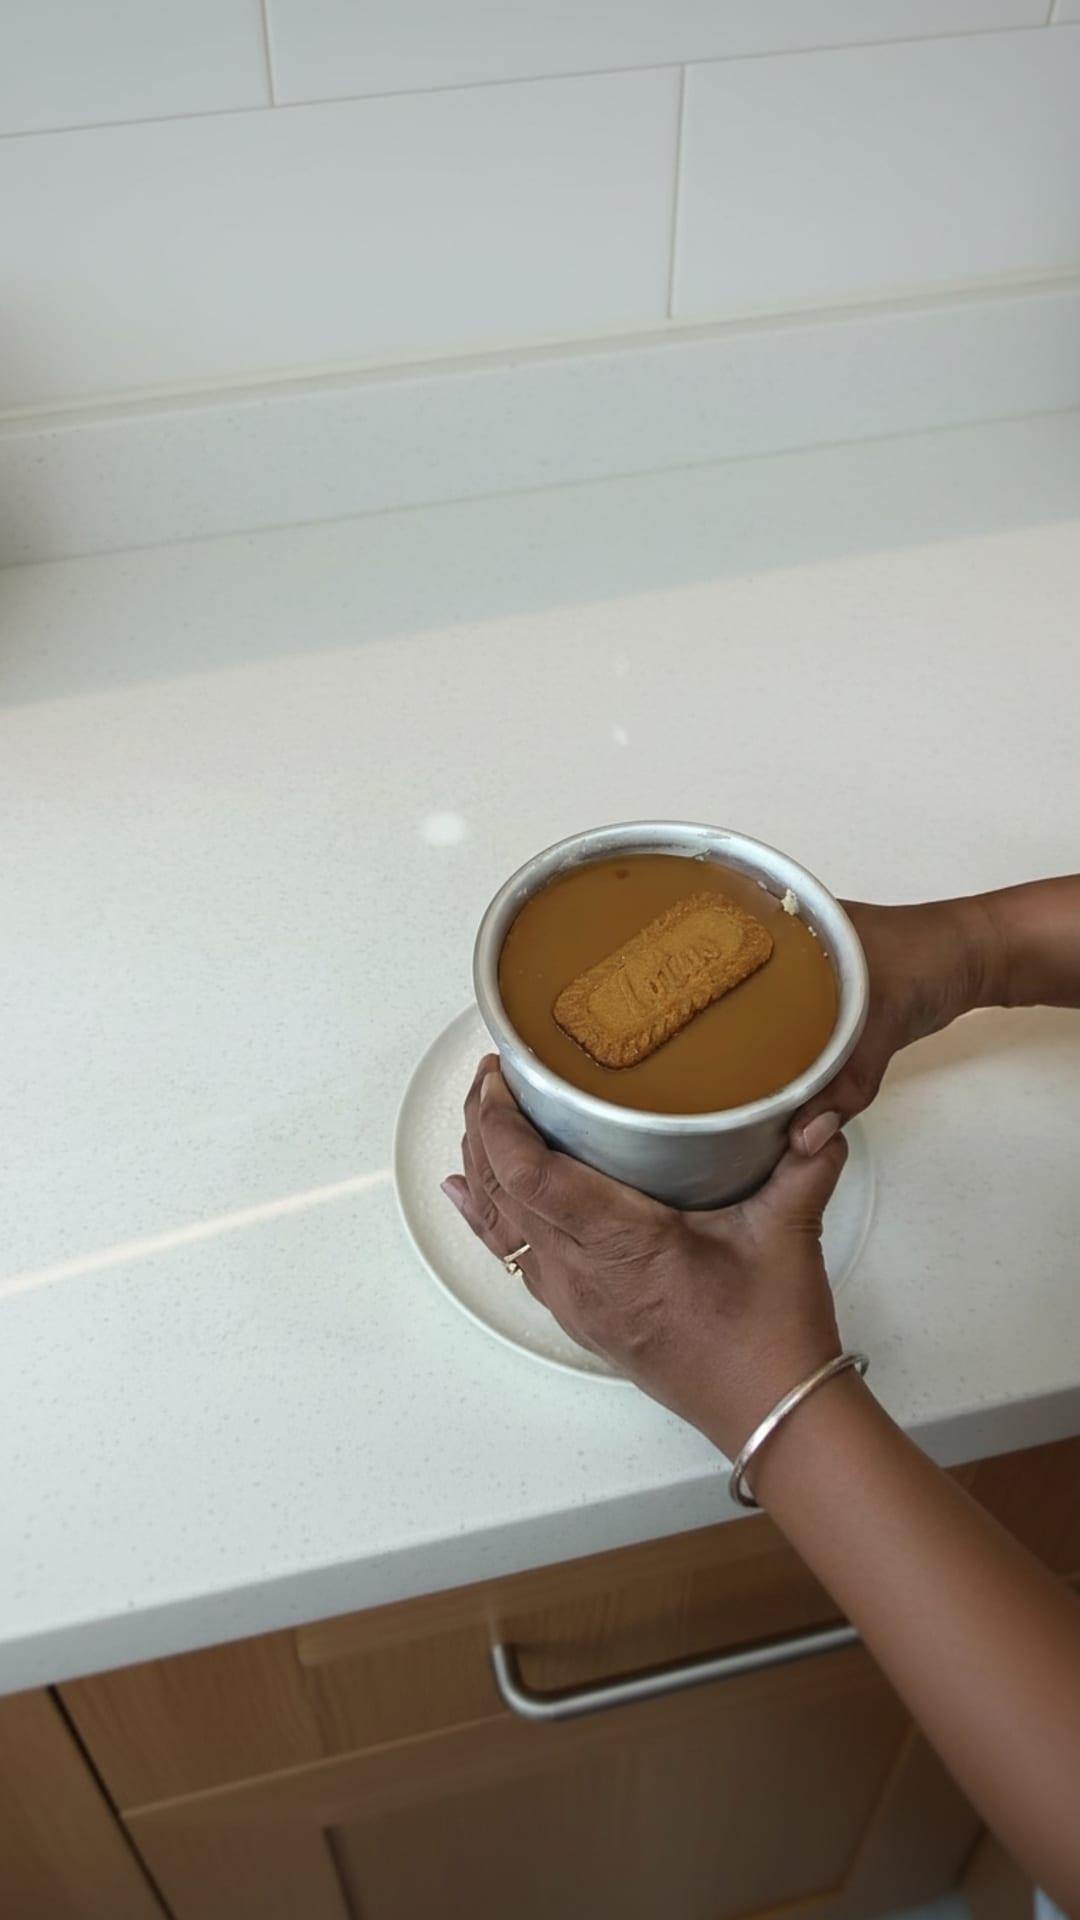
    The next day, take the cheesecake out of the refrigerator. To demold, place an inverted glass on a serving plate, then carefully place the loose-bottom cake tin on top of the glass. Gently press down the sides of the tin to release the cheesecake. Slice and serve this delicious no-bake Biscoff cheesecake.
Printed from Fullmeals.com — turn any cooking video into a recipe.

No-Bake Biscoff Cheesecake with Homemade Cream Cheese

Ready in

840 mins

Cuisine

European · Belgian

Prep Time

30 min

Cook Time

10 min

Serving

4 People

Calories / Serving

~450 kcal
Recipe by Healthy Recipes Home by Malika Khurana on YouTube
Adjust Servings
Measurements
Tap an ingredient to mark it ready0 of 9 ready
All Ingredients

For Homemade Cream Cheese

All Ingredients

For Biscoff Biscuit Base

All Ingredients

For Cheesecake Filling & Topping

Step-by-Step Instructions

Follow each step to make the recipe successfully.

  1. 1

    Prepare Homemade Cream Cheese

    Pour 1 liter of full-fat milk into a pot (add a little water to the pot first to prevent sticking). Place it on the stove and bring to a boil over high heat. While the milk boils, prepare the vinegar mixture by combining 1 tablespoon of vinegar with 1 tablespoon of water in a separate bowl. Once the milk boils, turn off the flame and let it cool for .

  2. 2

    Curdle Milk and Strain Paneer

    Gradually add the diluted vinegar mixture to the milk while continuously stirring. Continue adding until the milk curdles and the yellowish whey separates from the paneer. Place a sieve over a pot and line it with a clean cloth. Pour the curdled milk into the cloth to separate the paneer from the whey water. Let the paneer cool down completely.

  3. 3

    Prepare Biscoff Biscuit Base

    Take 7 Biscoff biscuits and crush them into a fine powder using a mixer grinder. Transfer the biscuit powder to a mixing bowl. Add 2 teaspoons of melted ghee (or butter) to the biscuit powder and mix well until it resembles wet sand and binds together when pressed.

  4. 4

    Form the Biscuit Layer

    Pour the prepared biscuit mixture into a loose-bottom cake tin. Spread the mixture evenly across the bottom of the tin using a spoon. Use a flat-bottomed glass or a similar tool to firmly press down the biscuit layer, ensuring it is compact and well-set. Place the mold in the refrigerator for to allow the biscuit base to set properly.

  5. 5

    Whip the Cream

    Take 1/4 cup of non-dairy cream. Ensure the cream is cold (if stored in the freezer, thaw it in the refrigerator 1-2 days prior). the cream using an electric until stiff peaks form. (If using a hand , it will take longer). Invert the bowl to check if the cream holds its shape, indicating it's perfectly .

  6. 6

    Prepare Cream Cheese for Filling

    Take the cooled paneer and place it into the mixer grinder jar (the same one used for biscuits is fine). Add a pinch of salt. Blend the paneer on mode (run for a few seconds, then stop, repeat 2-3 times) until it achieves a smooth texture. Avoid over-blending. If the mixture appears too dry, add 1-2 spoons of the reserved whey water. The resulting cream cheese should be approximately 1/2 cup.

  7. 7

    Melt Biscoff Spread

    Take 2 tablespoons of Biscoff creamy spread and place it in a microwave-safe bowl. Microwave for until it is melted and smooth.

  8. 8

    Combine Filling Ingredients

    To the cream, add the melted Biscoff spread, 1 tablespoon of powdered sugar (optional), and the freshly made cream cheese. Gently mix all the ingredients using a cut-and-fold method with a spatula. Do not overmix, as this can cause the mixture to curdle.

  9. 9

    Assemble the Cheesecake Layers

    Retrieve the cake tin with the set biscuit base from the refrigerator. Pour the prepared cream cheese filling mixture over the biscuit base. Gently tap the tin a few times to ensure the filling settles evenly. Place the tin back into the refrigerator for at least to allow the cream cheese layer to set.

  10. 10

    Add Topping and Chill Overnight

    After the cream cheese layer has set (check by lightly touching it with a finger), pour the remaining 2 tablespoons of melted Biscoff spread evenly over the top. Place one whole Biscoff biscuit on top for garnish. Refrigerate the cheesecake overnight for optimal setting and flavor development.

  11. 11

    Demold and Serve

    The next day, take the cheesecake out of the refrigerator. To demold, place an inverted glass on a serving plate, then carefully place the loose-bottom cake tin on top of the glass. Gently press down the sides of the tin to release the cheesecake. Slice and serve this delicious no-bake Biscoff cheesecake.

Before You Cook

Helpful details before you start
Ingredient SubstitutionsMissing something? View suitable alternatives.
View 3 swaps
  • No Milk?

    • Unsweetened almond / soy / oat milk (1:1)
    • 1/2 cup evaporated milk + 1/2 cup water (per 1 cup)
  • No Ghee?

    • Unsalted butter (1:1)
    • Neutral oil (1:1, lacks the toasted note)
  • No Heavy cream?

    • 3/4 cup whole milk + 1/4 cup melted butter — Good for sauces, not whipping.
    • Equal parts evaporated milk
    • Full-fat coconut milk (1:1) — Adds mild coconut flavor.
Ingredient Substitutions
  • No Milk?

    • Unsweetened almond / soy / oat milk (1:1)
    • 1/2 cup evaporated milk + 1/2 cup water (per 1 cup)
  • No Ghee?

    • Unsalted butter (1:1)
    • Neutral oil (1:1, lacks the toasted note)
  • No Heavy cream?

    • 3/4 cup whole milk + 1/4 cup melted butter — Good for sauces, not whipping.
    • Equal parts evaporated milk
    • Full-fat coconut milk (1:1) — Adds mild coconut flavor.
AllergensThis recipe contains gluten and dairy.
glutendairy

Plan Ahead

Complete this step earlier to save time later.

  • Step10
    Add Topping and Chill OvernightOvernight

    After the cream cheese layer has set (check by lightly touching it with a finger), pour the remaining 2 tablespoons of melted Biscoff spread evenly over the top. Place one whole Biscoff biscuit on top for garnish. Refrigerate the cheesecake overnight for optimal setting and flavor development.

    View Step 10

Storage & Leftovers

Keep your leftovers fresh and ready to enjoy.

  • Refrigerate

    Place the mold in the refrigerator for 15-20 minutes to allow the biscuit base to set properly.

  • Refrigerate

    Place the tin back into the refrigerator for at least 30 minutes to allow the cream cheese layer to set.

  • Refrigerate

    Refrigerate the cheesecake overnight for optimal setting and flavor development.

  • FreezeUp to 2 days

    Ensure the cream is cold (if stored in the freezer, thaw it in the refrigerator 1-2 days prior).

Variations

Simple ways to adapt this recipe.

  • 1
    You can use lemon juiceIngredient swap

    You can use lemon juice instead of vinegar to curdle the milk.

  • 2
    The creator mentions she canCustomise

    The creator mentions she can make a video on homemade Biscoff spread and making cheesecake without a mold if requested in comments.

Helpful Tips

Small details that can improve the final result.

  • 1
    Cooking tipUse Full

    Fat milk for cream cheese to ensure creaminess. If using boiled milk, include the malai (cream).

  • 2
    TipDilute Vinegar with Water to

    Dilute vinegar with water to make the paneer soft.

  • 3
    Nutrition noteThe Whey Water (left After

    The whey water (left after making paneer) is protein-rich and can be used for kneading dough or in curries.

  • 4
    Cooking tipBlend Paneer on Pulse Mode (stop

    Start) to achieve a smooth texture without over-blending. Add 1-2 spoons of whey water if it's too dry.

  • 5
    TipDo Not Overmix the Cheesecake

    Do not overmix the cheesecake filling after adding cream cheese and biscoff spread, as it may curdle.

  • 6
    TipGently Tap the Biscuit Base

    Gently tap the biscuit base and cream cheese layers to set them, avoid hard tapping to prevent disturbing the layers.

Was this recipe helpful?

Comments (0)

Sign in to leave a comment on this recipe.

Loading comments...

More from Healthy Recipes Home by Malika Khurana

Other recipes converted from Healthy Recipes Home by Malika Khurana's cooking videos.

Meghna Style Paneer Biryani

Meghna Style Paneer Biryani

Cuisine

Indian · North Indian

Prep + Cook Time

45 Minutes

Difficulty Level

Medium

You might also like

Other recipes in the same cuisine, meal type, or style — ready to cook whenever you are.

Arabian Bread Pudding

Arabian Bread Pudding

Cuisine

Middle Eastern · Arabian

Prep + Cook Time

3 hr 20 min

Difficulty Level

Easy

Caramel Milk Pudding

Caramel Milk Pudding

Cuisine

Dessert

Prep + Cook Time

35 Minutes

Difficulty Level

Easy

Mango Ice Cream – Homemade & Easy

Mango Ice Cream – Homemade & Easy

Cuisine

Dessert

Prep + Cook Time

6 hr 15 min

Difficulty Level

Easy

Makhandi Halwa – Delicious Semolina Dessert

Makhandi Halwa – Delicious Semolina Dessert

Cuisine

Indian · North Indian

Prep + Cook Time

35 Minutes

Difficulty Level

Medium

Gulab Jamun - Mawa & Wheat Flour Style

Gulab Jamun - Mawa & Wheat Flour Style

Cuisine

Indian · North Indian

Prep + Cook Time

1 hr 50 min

Difficulty Level

Medium

Meethi Tikkiyan Recipe - Indian Sweet Biscuits

Meethi Tikkiyan Recipe - Indian Sweet Biscuits

Cuisine

Indian · North Indian

Prep + Cook Time

1 hr 25 min

Difficulty Level

Medium