Homemade Bread Rolls – Easy No-Knead Recipe
Summary
- This recipe guides you through making delicious homemade bread rolls with a crispy crust and soft interior. It uses a no-knead method, making it surprisingly easy to achieve bakery-quality bread at home. The dough is stretched, folded, and allowed to proof overnight for enhanced flavor and texture.
All Ingredients - Main Ingredients
- Water 1 cup (220 ml)
- Fresh yeast ¾ tsp (3 g)
- Dry yeast ½ tsp (2 g)
- Bread flour 2 ½ cups (320 g)
- Salt 1 tsp (6 g)
Tools You'll Need
- Dutch oven
- Baking sheet
- Oven
- Mixing bowl
- Wooden spoon
- Bowl
- Knife
- Parchment paper
Plan Ahead
Up to 1 hr 30 min of hands-off time you can shift to earlier.
- Step 3 · Rest30 min
First Rest Cover the bowl with a lid and let the dough rest at room temperature…
- Step 5 · Rest30 min
Second Rest Cover the bowl again and let the dough rest for another 30 minutes.
- Step 7 · Overnight
Overnight Proof Cover the bowl and let the dough proof overnight in the fridge…
- Step 8 · Refrigerate30 min
Bring to Room Temperature If proofed in the fridge, allow the dough to come to room temperature for 30 minutes.
⚠ Contains Allergens
Step-by-Step Instructions
Step 1: Combine Water and Yeast
Pour 1 cup (220 ml) of water into a large bowl. Add ¾ tsp (3 g) of fresh yeast or ½ tsp (2 g) of dry yeast. Mix with a wooden spoon until the yeast is dissolved.
Step 2: Add Flour and Salt
Add 2 ½ cups (320 g) of bread flour and 1 tsp (6 g) of salt to the bowl. Mix with the wooden spoon until there is no more dry flour, forming a shaggy dough. No is required at this stage.
Step 3: First Rest
Cover the bowl with a lid and let the dough rest at room temperature for .
Step 4: First Stretch and Fold
Wet your hand with water. Gently stretch each of the four sides of the dough upwards and fold it towards the center. Repeat this process for all four sides. Then, lift the entire dough from the bowl and slap it back down, repeating this 'lift and slap' technique several times to build strength.
Step 5: Second Rest
Cover the bowl again and let the dough rest for another .
Step 6: Second Stretch and Fold
Repeat the stretching, folding, and 'lift and slap' steps from before. The dough should look great and be more elastic.
Step 7: Overnight Proof
Cover the bowl and let the dough proof overnight in the fridge (or on the counter until it doubles in size if you prefer a shorter proof).
Step 8: Bring to Room Temperature
If proofed in the fridge, allow the dough to come to room temperature for .
Step 9: Prepare Work Surface and Divide Dough
Lightly sprinkle flour on your work surface. Gently scrape the dough out of the bowl onto the floured surface. Fold the dough a few times to make it easier to cut. Using a dough scraper, cut the dough into 4 equal parts.
Step 10: Shape the Rolls (First Method)
Take one piece of dough, flatten it slightly with your hands. Roll the dough into a ball by folding the edges towards the center. Rub the dough against the work surface in a circular motion to seal the bottom and create tension on the surface. This technique gives structure to each loaf and helps them hold their shape better.
Step 11: Shape the Rolls (Second Method)
Take another piece of dough and flatten it. Roll the dough tightly from one end to the other, pressing down with your fingers as you roll. Pinch the seam to seal it, forming an elongated roll.
Step 12: Arrange on Baking Tray
Place the shaped rolls onto a baking tray lined with parchment paper, ensuring there is space between them.
Step 13: Final Rise
Cover the baking tray with a clean towel and let the rolls rise for .
Step 14: Prepare for Baking
Lightly sprinkle flour over the risen bread rolls. Gently smooth the flour with your hand (this step is optional). top of each bread roll with a sharp blade or knife to allow for expansion during baking. Sprinkle a little water around the bread on the baking tray to create in the oven.
Step 15: Bake (Covered)
Cover the baking tray with another tray of the same size, creating a Dutch oven effect. Bake in a preheated oven at 450°F (approximately 230°C) (230°C (approximately 445°F)) for .
Step 16: Bake (Uncovered)
Carefully remove the top tray from the oven. the oven temperature to 390°F (approximately 200°C) (200°C (approximately 390°F)) and bake for 10 more minutes, or until the crust is golden brown and crispy.
Step 17: Cool and Serve
Remove the baked bread rolls from the oven and let them cool slightly. Tap the bottom of a roll; a hollow sound indicates it's perfectly baked. Slice and serve with butter or your favorite spread.
Pro Tips
• Crispy crust, soft inside
• Perfect texture and taste
• Just mix, no need to knead
• The 'lift and slap' technique helps develop the dough's structure
• Overnight rise enhances flavor and texture
• Hollow taps on the bottom of the bread indicate it's perfectly baked
More from Home Cooking
Other recipes converted from Home Cooking's cooking videos.
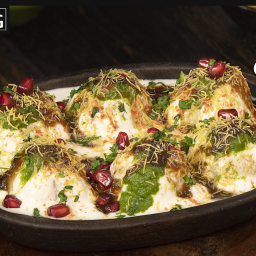
Dahi Bhalla – Indian Street Food
Cuisine
Indian · North Indian
Prep + Cook Time
4 hr 30 min
Difficulty Level
Medium
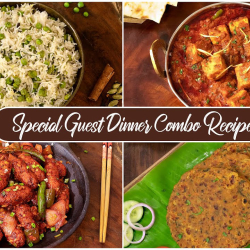
Matar Pulao – Home Cooking
Cuisine
Indian · North Indian
Prep + Cook Time
35 Minutes
Difficulty Level
Easy

Pav Bhaji – Indian Street Food
Cuisine
Indian · Maharashtrian
Prep + Cook Time
1 hr 5 min
Difficulty Level
Medium

Rasam Rice - Home Cooking
Cuisine
Indian · South Indian
Prep + Cook Time
25 Minutes
Difficulty Level
Easy

Malai Paneer – Home Cooking
Cuisine
Indian · North Indian
Prep + Cook Time
45 Minutes
Difficulty Level
Medium

Ragda Chaat - Street Style
Cuisine
Indian · Street Food
Prep + Cook Time
8 hr 30 min
Difficulty Level
Easy
You might also like
Other recipes in the same cuisine, meal type, or style — ready to cook whenever you are.
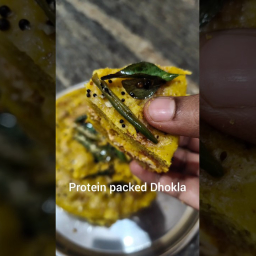
Paneer Stuffed Dhokla – Indian Snack
Cuisine
Indian · Gujarati
Prep + Cook Time
45 Minutes
Difficulty Level
Medium

Taiwanese Dan Bing (Egg Crepe)
Cuisine
Asian · Taiwanese
Prep + Cook Time
25 Minutes
Difficulty Level
Easy
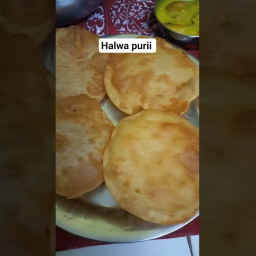
Puri Halwa with Sprouts Curry – Indian Breakfast/Snack
Cuisine
Indian · North Indian
Prep + Cook Time
55 Minutes
Difficulty Level
Medium
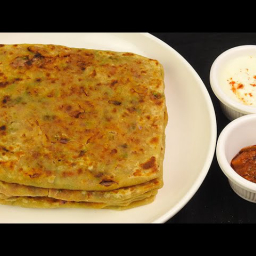
Pyaaz Paratha
Cuisine
Indian · North Indian
Prep + Cook Time
50 Minutes
Difficulty Level
Medium

Oats Idli with Chettinad Tomato Chutney
Cuisine
Indian · South Indian
Prep + Cook Time
1 hr 5 min
Difficulty Level
Medium
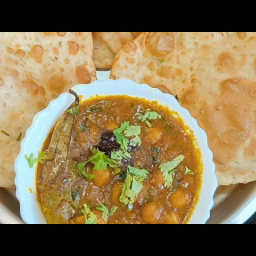
Chole Bhature - Indian Street Food Style
Cuisine
Indian · North Indian
Prep + Cook Time
1 hr 15 min
Difficulty Level
Comments
Sign in to leave a comment on this recipe.
Loading comments...