Healthy Chocolate Plum and Walnut Bonbons (No Sugar Added)
Summary
- These delicious and festive bonbons are made without any added sugar or sweeteners, making them a healthy treat. They feature a rich blend of dried plums and walnuts, coated in dark chocolate and elegantly decorated with edible gold dust and chocolate drizzles. Perfect for holidays or a guilt-free indulgence.
All Ingredients - Main Ingredients
- Dried Blue Plums (Pitted) 170 g
- Walnuts 170 g
- Dark Chocolate (for coating) 100 g
- Edible Gold Dust (for decoration) as needed
Tools You'll Need
- Saucepan
- Bowl
- Strainer
- Piping bag
- Parchment paper
Plan Ahead
Up to 30 min of hands-off time you can shift to earlier.
- Step 7 · Refrigerate30 min
Chill to Set Place the decorated bonbons in the refrigerator for approximately 30-60 minutes, or until the chocolate coating has c…
⚠ Contains Allergens
Step-by-Step Instructions
Step 1: Prepare the Fruit and Nut Mixture
Place the 170g dried pitted blue plums and 170g walnuts into a food chopper. Process the mixture in two batches until it forms a coarse, crumbly texture. Ensure it's not over-processed into a smooth puree, as a slightly coarser consistency enhances the taste of the bonbons.
Step 2: Form the Bonbons
Take small portions of the plum and walnut mixture and roll them between your palms to form round balls, approximately the size of a small walnut. Place the formed bonbons on a piece of parchment paper or a silicone mat.
Step 3: Melt the Dark Chocolate
Place 100g of dark chocolate in a heatproof bowl. Set the bowl over a saucepan of water (double boiler) ensuring the bottom of the bowl does not touch the water. Stir the chocolate continuously until it is completely melted and smooth.
Step 4: Coat the Bonbons in Chocolate
Using two toothpicks, carefully dip each bonbon into the melted dark chocolate, ensuring it's fully coated. Gently tap the bonbon against the side of the bowl to remove any excess chocolate. Transfer the coated bonbon back to the silicone mat.
Step 5: Decorate with Edible Gold Dust
While the chocolate coating is still wet, lightly sprinkle edible gold dust over the coated bonbons using a small sieve and a spoon. This step is optional but adds a festive and elegant touch.
Step 6: Drizzle with Remaining Chocolate
Transfer any remaining melted chocolate into a piping bag or a small plastic bag with a tiny corner snipped off. Drizzle thin lines of chocolate over the bonbons to create additional decorative patterns.
Step 7: Chill to Set
Place the decorated bonbons in the refrigerator for approximately , or until the chocolate coating has completely hardened. Once set, they will easily detach from the silicone mat.
Step 8: Serve and Store
Once the chocolate is firm, carefully place each bonbon into small paper cups. Arrange them in a decorative box for serving or gifting. Store any remaining bonbons in an airtight container in the refrigerator.
Pro Tips
• Use soft dried plums for a better texture in the mixture.
• Do not over-process the plum and walnut mixture; aim for a slightly coarse consistency, not a smooth puree, for added texture.
• For uniform bonbon sizes, weigh each portion of the mixture before forming into balls.
• A silicone mat is very convenient for placing the chocolate-coated bonbons, as they easily detach once the chocolate hardens.
• Any leftover melted chocolate can be saved, re-melted, and used for future recipes.
Variations
• Substitute dried plums with other dried fruits like dates, apricots, or raisins.
• Replace walnuts with other nuts such as almonds, cashews, or pecans.
• Experiment with a mix of different dried fruits and nuts for varied flavors and textures.
• Use white chocolate for coating or for contrasting decorative drizzles.
• Add a pinch of cinnamon or orange zest to the plum and walnut mixture for extra flavor.
Storage & Leftovers
How to keep what you don't finish — pulled straight from the recipe.
- Refrigerate
Place the decorated bonbons in the refrigerator for approximately 30-60 minutes, or until the chocolate coating has completely hardened.
- Store
Any leftover melted chocolate can be saved, re-melted, and used for future recipes.
- Store
Store any remaining bonbons in an airtight container in the refrigerator.
More from Вкусно у Вали
Other recipes converted from Вкусно у Вали's cooking videos.
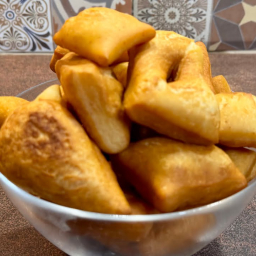
Bulgarian Mekici (Fried Dough) - Quick and Easy
Cuisine
Bulgarian
Prep + Cook Time
35 Minutes
Difficulty Level
Easy
You might also like
Other recipes in the same cuisine, meal type, or style — ready to cook whenever you are.
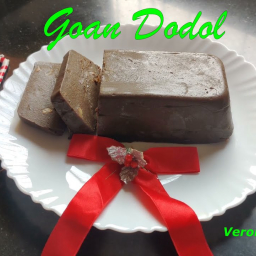
Goan Dodol - Traditional Goan Sweet
Cuisine
Indian · Goan
Prep + Cook Time
1 hr 30 min
Difficulty Level
Medium
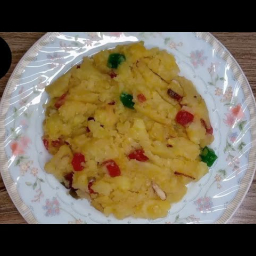
Potato Halwa Sweet
Cuisine
Indian · South Asian
Prep + Cook Time
35 Minutes
Difficulty Level
Easy
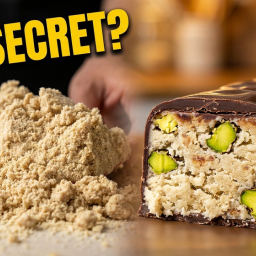
Halwa Dessert – My Food Secret
Cuisine
Middle Eastern
Prep + Cook Time
4 hr 35 min
Difficulty Level
Easy
Sooji ka Tukdi Halwa (Semolina Fudge)
Cuisine
Indian · South Asian
Prep + Cook Time
30 Minutes
Difficulty Level
Easy
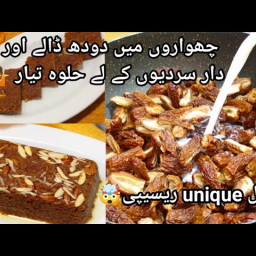
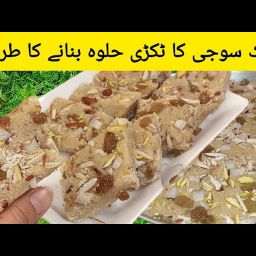
Dry Dates Halwa (Chhuaron ka Halwa) - Unique & Healthy
Cuisine
Pakistani · South Asian
Prep + Cook Time
50 Minutes
Difficulty Level
Medium

Gajar Halwa (Carrot Halwa) – Indian Style
Cuisine
Indian · North Indian
Prep + Cook Time
55 Minutes
Difficulty Level
Comments
Sign in to leave a comment on this recipe.
Loading comments...