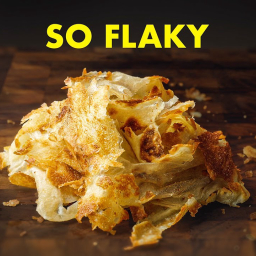
Roti Canai – Malaysian Flatbread
Summary
- Roti Canai is a multi-layered Malaysian flatbread with a crispy, crackly exterior and a multitude of tender, chewy layers inside. This recipe provides a detailed guide to making the dough, stretching it (both fancy and beginner-friendly ways), shaping, cooking, and serving with a super easy coconutty curry dip. It also includes instructions for freezing and storing the roti for quick future meals.
Video Chapters
Jump straight to any step in the video.
All Ingredients - Dough
- Water, lukewarm 300ml
- Condensed milk 60g (3 tbsp)
- Butter or ghee, melted 35g (2-1/2 tbsp)
- Fine sea salt 12g (2 tsp)
- Sugar 20g (1-1/2 tbsp)
- All-purpose flour 600g (4-1/4 cups)
All Ingredients - Curry Dip
- Full-fat coconut milk (for reduction) 1/2 cup (120mL)
- Thai red curry paste 2 tbsp
- Turmeric 1/4 tsp
- Garam masala 1/2 tsp
- Full-fat coconut milk 1/2 cup (120mL)
- Water 1/4 cup (60mL)
- Fish sauce to taste
- Sugar 1/4 tsp
- Additional salt to taste
Tools You'll Need
- Pan
- Skillet
- Mixing bowl
- Bowl
- Spatula
- Parchment paper
Plan Ahead
Some steps can be prepped earlier so cook time is shorter.
- Step 6 · Make ahead
…ults, place the tray in the fridge overnight and take it out one hour ahead of time to warm up before stretching.
Don't have an ingredient? Try these swaps
No Butter?
- 3/4 the amount of olive oil (for cooking, not baking)
- Equal parts ghee — Slightly nuttier flavor.
- Equal parts coconut oil (in baking)
No Ghee?
- Unsalted butter (1:1)
- Neutral oil (1:1, lacks the toasted note)
No All-purpose flour?
- White whole wheat flour (1:1)
- 1 cup minus 2 tbsp + 2 tbsp cornstarch (cake flour swap)
No Coconut milk?
- Equal parts heavy cream + 1/2 tsp coconut extract
- Whole milk + 1 tsp coconut oil (per cup)
No Garam masala?
- 1 tsp cumin + 1/2 tsp coriander + 1/4 tsp cinnamon + 1/4 tsp cardamom
No Fish sauce?
- Soy sauce + a squeeze of lime
- Worcestershire sauce + 1/2 tsp water
⚠ Contains Allergens
Step-by-Step Instructions
Step 1: Combine Wet Ingredients (Dough)
To a large mixing bowl, add 300ml lukewarm water, 60g condensed milk, 35g melted butter or ghee, 12g fine sea salt, and 20g granulated sugar. Stir until well combined.
Step 2: Mix in Flour (Dough)
Add 600g all-purpose flour to the bowl. Stir as much as possible with a spoon, then switch to hands to bring the dough together. If there's lots of dry flour left at the bottom of the bowl, add up to 3 teaspoons of water to help the dough come together. only until all the dry flour is incorporated and the dough is lump-free. The dough should still be shaggy, soft, and slightly tacky.
Step 3: Rest Dough (First Rest)
Cover the bowl and let the dough rest for .
Step 4: Knead Until Smooth (Dough)
After resting, the dough will be noticeably more elastic. the dough on a clean surface until smooth. This should only take about .
Step 5: Divide and Roll Dough Balls
Divide the dough into 10 equal parts. If weighing, each portion should be around 100g. Form the dough into smooth balls by gathering everything in the center and pinching together. Then, flip around and roll with a lightly cupped hand until smooth and round.
Step 6: Oil and Rest Dough Balls
Spread a generous amount of neutral oil all over a sheet tray. Liberally coat each dough ball with oil to prevent it from sticking and drying. Place the oiled dough balls on the tray. Cover the tray tightly with plastic wrap and let the dough rest for at least one hour at room temperature. For best results, rest for three hours at room temperature. For even better results, place the tray in the fridge overnight and take it out one hour ahead of time to warm up before stretching.
Step 7: Reduce Coconut Milk (Curry Dip)
Add 1/2 cup (120mL) full-fat coconut milk to a small pan over medium heat. Cook the coconut milk for about until it's , thick, and bubbly. This concentrates the coconut flavor.
Step 8: Fry Curry Paste and Spices (Curry Dip)
Add 2 tbsp Thai red curry paste to the coconut milk. Fry the curry paste for a few minutes until a vibrant red oil separates out. Once the oil separates, add 1/4 tsp turmeric and 1/2 tsp garam masala. Briefly stir and cook for about to extract fat-soluble flavors from the spices. Do not cook longer than that, as powdered spices will begin to burn.
Step 9: Simmer Curry (Curry Dip)
Immediately add another 1/2 cup (120mL) coconut milk and 1/4 cup (60mL) water. Add a few dashes of fish sauce to taste. Let it bubble away for for the flavors to melt together. Stir occasionally so that nothing sticks.
Step 10: Finish Curry (Curry Dip)
Finish with 1/4 tsp sugar. Taste to see if it needs any more salt. The final curry sauce should have the consistency of cream. It will thicken as it cools. If it gets too thick, thin it out with some water.
Step 11: Prepare Work Surface for Stretching
Work on the smoothest surface possible with at least 3ft x 3ft of working area. Have ready a small bowl filled with about 1/3 cup neutral oil. Spread a thin layer of oil all over the entire work surface.
Step 12: Initial Dough Stretch (Beginner Method)
Place a ball of rested dough onto the oiled surface. Add some more oil over top. Use a smooth, smearing motion with the heel of the hand to thin out the dough, working from the center out. Aim for a circle about the size of a dinner plate with even thickness throughout.
Step 13: Stretch Dough by Tossing (Advanced Method)
Start with hands together, dominant hand face up, non-dominant hand face down. The hand facing up goes under the dough, and the other hand on top. Gently grip with the thumbs. Keep other fingers flat to evenly distribute pressure. Imagine holding a large plate so that the hands stay parallel to each other. The toss will go in the direction of the non-dominant hand. Bring both hands towards that shoulder, then briskly swing them down back towards the counter, keeping the hands parallel throughout the entire motion. Go fast on the way down; momentum stretches the dough. The goal is to have the dough land evenly without creasing or folding over. If the dough does fold, smooth it out before moving on to the next toss. The hands start out close to each other, but as the dough grows in size, so does the distance between the two hands. This allows for maximum control over the dough. With each subsequent toss, rotate the dough slightly so that we're stretching all the way around the perimeter. Keep tossing until the center of the dough is thin and translucent.
Step 14: Stretch Edges (Both Methods)
Stretch the edges of the dough and any other parts that remained thick so that the whole surface is even and translucent. Any thick portions left will interfere with the final texture of the roti. Lightly pull with the fingertips, barely even gripping. Be patient here, go gently but firmly, and stretch as thin as possible. There will still be a tiny portion of thick dough left around the edges. Go around with the heel of the hand and smudge out this border to thin it out. (Alternatively, if feeling lazy, tear off the thicker edge by tucking on only the border, and it will naturally rip off).
Step 15: Shape the Roti
Scatter some oil onto the stretched-out dough. Gently lift up one side of the dough and fold it towards the center. Fold the opposite side towards the center as well. The two sides should meet in the middle, overlapping slightly. If the edges of the dough roll back or bunch up, unroll it and smooth it out to avoid dense sections. Fold the left and right sides towards the center as well, overlapping slightly. What's left should be a neat square or rectangle. Flip it over so that the bottom is facing up. Smooth a bit more oil all over.
Step 16: Preheat Skillet and Oil
Preheat a non-stick skillet over medium-low heat for about . Add about 2 to 3 tablespoons of neutral oil or ghee to the skillet.
Step 17: Final Stretch and Cook Roti
Cook the roti in the order that you shaped them. Right before cooking, give each roti one final stretch out. Smush and stretch from the center out, focusing on any thicker sections. Try to make the roti evenly translucent all over. Once the oil is lightly shimmering, place in the stretched roti. If the roti puffs up, use a spatula to gently press it down so that it cooks evenly. Cook on the first side until it's golden brown, then flip over. Generally, the second side won't take as long to cook. If cooking with oil and not ghee, when the second side is just starting to color, add a small knob of butter and swirl it around to melt. Make sure that both sides of the roti get to soak up some butter. Once golden on both sides, transfer the roti out of the pan. Wipe out the skillet with a paper towel and add fresh oil before cooking another roti.
Step 18: Fluff the Roti
Once the roti comes out of the pan, for a few moments to cool a bit. Then, vigorously and firmly clap the roti between two hands. Be careful because it may still be hot. You can use a tea towel to protect your hands, or just go for it (but don't sue if you burn yourself!). This process transforms the roti into its final form, breaking up the crisp exterior and fluffing up all of the layers inside. Really go for it; clap and fluff to your heart's content. There's no overdoing it.
Step 19: Freeze and Store Roti
After the roti has been shaped and rested, give each one a final stretch out as if about to cook. Stack them on a tray, placing parchment paper between each roti to prevent sticking. Cover the tray tightly with plastic wrap and freeze for several hours until all the rotis are hardened. Finally, transfer all of it to a freezer bag and seal it up tight. They'll be good for at least 3 months in the freezer. The roti can be cooked straight from frozen. Because it's so thin, it thaws almost instantly in the pan.
Pro Tips
• For best results, let the dough balls rest for three hours at room temperature.
• For even better results, place the dough balls in the fridge overnight and warm up for one hour before stretching.
• Work on the smoothest surface possible with at least 3ft x 3ft of working area for stretching.
• When stretching the dough by tossing, go fast on the way down; momentum stretches the dough.
• If any holes appear during stretching, don't worry, that's totally normal. Just stretch gently around them.
• When cooking, lots of oil plus extra browning will create a really crispy, flaky roti.
• Less oil and less browning will make for a roti that's softer yet still lightly crisp.
• Roti Canai can be frozen and cooks up just as good as fresh. Cook straight from frozen.
• Vigorously and firmly clap the cooked roti between two hands to fluff it up and separate the layers.
Variations
• Vegan/dairy-free dough option available in the written recipe (link in description).
• Use a regular brand bread flour in the US (e.g., King Arthur All-Purpose Flour) for similar results to Canadian all-purpose flour.
• Do not use bread flour in Canada, it will make the roti too tough.
• Repurpose a Thai red curry paste for the dip instead of a Malaysian curry paste for easier sourcing.
Storage & Leftovers
How to keep what you don't finish — pulled straight from the recipe.
- Freeze
Cover the tray tightly with plastic wrap and freeze for several hours until all the rotis are hardened.
- Freezeup to 3 months
They'll be good for at least 3 months in the freezer.
Your Notes
Jot down your tweaks — swaps you tried, cook-time adjustments, family reactions. Saved on this device only, and printed with the recipe.
More from Sheldo's Kitchen
Other recipes converted from Sheldo's Kitchen's cooking videos.
Sheldo's Very Best Roti Canai with Easy Curry Dip
Cuisine
Malaysian · Indian
Prep + Cook Time
2 hr 10 min
Difficulty Level
Hard
You might also like
Other recipes in the same cuisine, meal type, or style — ready to cook whenever you are.
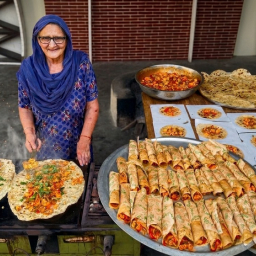
Paneer Kathi Rolls – Indian Street Food
Cuisine
Indian · Punjabi
Prep + Cook Time
1 hr 30 min
Difficulty Level
Medium
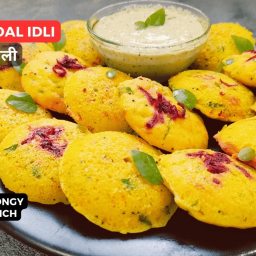
Soft & Spongy Moong Dal Idli with Coconut Chutney
Cuisine
Indian · South Indian
Prep + Cook Time
50 Minutes
Difficulty Level
Easy
Poha Tomatobath
Cuisine
Indian · South Indian
Prep + Cook Time
25 Minutes
Difficulty Level
Easy
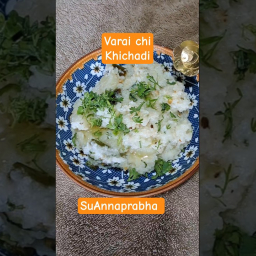
Barnyard Millet Khichadi – Healthy & Easy
Cuisine
Indian · North Indian
Prep + Cook Time
30 Minutes
Difficulty Level
Easy

Skinless Longganisa for Business (Pang Negosyo)
Cuisine
Filipino · Filipino
Prep + Cook Time
2 hr 50 min
Difficulty Level
Medium
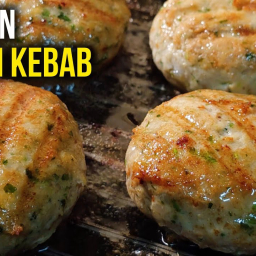
Chicken Reshmi Kebab – Soft, Juicy and Cheesy
Cuisine
Indian · North Indian
Prep + Cook Time
2 hr 20 min
Difficulty Level
Comments
Sign in to leave a comment on this recipe.
Loading comments...