Homemade Whole Wheat Brown Bread
Summary
- Learn how to bake a healthy and delicious whole wheat brown bread at home with this simple recipe. Using just a few basic ingredients and two easy proofing steps, you can achieve a soft, fluffy, and bakery-like bread perfect for breakfast or kids' tiffins.
All Ingredients - Main Ingredients
- Warm water 1/2 cup
- Sugar 2 tsp
- Instant Dry Yeast 2.5 tsp
- Wheat flour 3 cup
- Salt 1.5 tsp
- Cooking oil 2 tsp
- Oil for greasing as needed
- Butter as needed
Tools You'll Need
- Oven
- Bowl
- Rolling pin
- Knife
- Cutting board
Plan Ahead
Up to 7 hrs of hands-off time you can shift to earlier.
- Step 4 · Rest2 hrs
…properly with cling film or aluminum foil to create an airtight seal. Let the dough rest for 2 hours in a warm place for its first proofing, until it doubles…
- Step 8 · Rest1 hr
…r the baking tin completely with aluminum foil, ensuring it's sealed. Let the dough rest for 1 hour for its second proofing, until it rises and fills the tin.
- Step 11 · Rest4 hrs
…for extra softness. Cover the hot bread with a damp, clean cloth and let it rest for 4-5 hours to cool down completely and set properly. This step is…
Don't have an ingredient? Try these swaps
No Butter?
- 3/4 the amount of olive oil (for cooking, not baking)
- Equal parts ghee — Slightly nuttier flavor.
- Equal parts coconut oil (in baking)
⚠ Contains Allergens
Step-by-Step Instructions
Step 1: Activate the Yeast
In a bowl, add 1/2 cup warm water, 2 teaspoons of sugar, and 2.5 teaspoons of instant dry yeast. Gently mix it and cover the bowl. for to activate the yeast. The mixture should become foamy on top, indicating active yeast.
Step 2: Prepare the Dough Base
Once the yeast is activated, add 3 cups of wheat flour, 1.5 teaspoons of salt, and 2 teaspoons of cooking oil to the bowl. Mix all the ingredients well with your hands.
Step 3: Knead the Dough
Gradually add normal water (not cold or hot) and the mixture into a soft dough. Avoid over-; just bring it together until smooth.
Step 4: First Proofing
Apply a little oil to the dough and smooth the top. Cover the bowl properly with cling film or aluminum foil to create an airtight seal. Let the dough rest for in a warm place for its first proofing, until it doubles in size.
Step 5: Punch Down and Reshape
After , the dough should have doubled. Gently punch down the dough to release the air bubbles. Add a few drops of oil to your hands and it again lightly to make it smooth. Transfer the dough to a clean surface.
Step 6: Roll and Fold the Dough
Roll the dough into a rectangular shape using a rolling pin, ensuring it's roughly the length of your baking tin. Fold one side of the dough over, then fold the other side over to meet it, creating a compact loaf shape.
Step 7: Prepare Baking Tin and Place Dough
Grease your baking tin thoroughly with oil. Carefully place the folded dough into the prepared baking tin. Gently press it down to fit the tin.
Step 8: Second Proofing
Cover the baking tin completely with aluminum foil, ensuring it's sealed. Let the dough rest for for its second proofing, until it rises and fills the tin.
Step 9: Preheat Oven and Initial Bake
Preheat your oven to 200 degrees Celsius (approximately 390°F) for . Once preheated, carefully place the baking tin with the dough into the oven. Set the timer for at 200 degrees Celsius (approximately 390°F), ensuring both top and bottom heating elements are on.
Step 10: Apply Butter and Finish Baking
After of baking, open the oven and carefully remove the bread. Apply a thin layer of butter on top of the bread. Place the bread back into the oven and continue baking for the remaining until it achieves a golden-brown crust.
Step 11: Cool and Set the Bread
Once the bread is fully baked and golden brown, remove it from the oven. You can optionally apply another layer of butter on top for extra softness. Cover the hot bread with a damp, clean cloth and for to cool down completely and set properly. This step is crucial for a soft texture.
Step 12: Unmold and Slice
After the bread has cooled and set, use a knife to gently scratch around the edges of the tin to loosen the bread. Flip the tin over onto a cutting board and tap it to unmold the bread. Slice the bread into desired thickness using a bread knife or a sharp regular knife.
Pro Tips
• Ensure warm water is used for yeast activation, not too hot or cold.
• Properly cover the dough during proofing to allow it to rise effectively.
• Use normal temperature water for kneading the dough.
• Allow the baked bread to cool completely for 4-5 hours before slicing for best texture.
• If yeast doesn't foam after 15 minutes, it might be inactive; do not proceed with the recipe.
Variations
• Use multigrain flour instead of whole wheat flour for a different flavor and added nutrients.
• For a texture closer to store-bought white bread, use all-purpose flour (maida) following the same process.
Storage & Leftovers
How to keep what you don't finish — pulled straight from the recipe.
- Store
For a texture closer to store-bought white bread, use all-purpose flour (maida) following the same process.
You might also like
Other recipes in the same cuisine, meal type, or style — ready to cook whenever you are.

Paneer Stuffed Dhokla – Indian Snack
Cuisine
Indian · Gujarati
Prep + Cook Time
45 Minutes
Difficulty Level
Medium

Puri Halwa with Sprouts Curry – Indian Breakfast/Snack
Cuisine
Indian · North Indian
Prep + Cook Time
55 Minutes
Difficulty Level
Medium
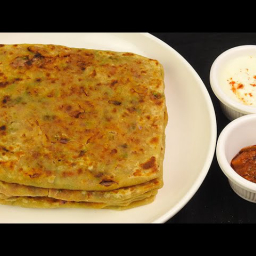
Pyaaz Paratha
Cuisine
Indian · North Indian
Prep + Cook Time
50 Minutes
Difficulty Level
Medium

Oats Idli with Chettinad Tomato Chutney
Cuisine
Indian · South Indian
Prep + Cook Time
1 hr 5 min
Difficulty Level
Medium

Chole Bhature - Indian Street Food Style
Cuisine
Indian · North Indian
Prep + Cook Time
1 hr 15 min
Difficulty Level
Medium

Maswadi ani Rassa (मासवडी आणि रस्सा) - Authentic Maharashtrian Recipe
Cuisine
Indian · Maharashtrian
Prep + Cook Time
1 hr
Difficulty Level
Comments
Sign in to leave a comment on this recipe.
Loading comments...