Quick & Easy Roti
Summary
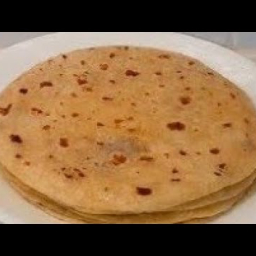
- This recipe guides you through making soft and pliable rotis from scratch. The process involves kneading a simple dough, allowing it to rest, rolling it into thin circles, and cooking them on a hot griddle until they puff up and develop golden-brown spots, then brushing with ghee or oil for a delicious finish.
Video Chapters
Jump straight to any step in the video.
All Ingredients - Main Ingredients
- Plain Flour (All-Purpose Flour) 2 cups
- Hot Water 1 cup
- Oil 2.5 teaspoons
- Salt 0.5 teaspoon
- Ghee or Oil some
- Extra Flour some
Tools You'll Need
- Griddle
- Frying pan
- Knife
- Mixing bowl
- Bowl
- Rolling pin
- Spatula
Don't have an ingredient? Try these swaps
No All-purpose flour?
- White whole wheat flour (1:1)
- 1 cup minus 2 tbsp + 2 tbsp cornstarch (cake flour swap)
No Ghee?
- Unsalted butter (1:1)
- Neutral oil (1:1, lacks the toasted note)
⚠ Contains Allergens
Step-by-Step Instructions
Step 1: Gather Ingredients
Gather all necessary ingredients: 2 cups of sifted plain flour (or all-purpose flour), 1 cup of hot water, 2.5 teaspoons of oil, 0.5 teaspoon of salt, some ghee or oil for brushing, and extra flour for dusting.
Step 2: Measure Flour Accurately
To ensure accurate measurement, take a heaped cup of flour, then use a flat object (like a knife) to lightly push it down and scrape off the excess flour. This method ensures you get precisely one cup of flour.
Step 3: Combine Dry Ingredients and Oil
In a large mixing bowl, add the measured flour, salt, and approximately 2 teaspoons of oil. Mix these ingredients quickly until they are well combined.
Step 4: Form the Dough
Gradually add the hot water to the flour mixture. Use a spoon to mix the ingredients until the dough begins to come together in a shaggy mass.
Step 5: Knead the Dough
Switch to using your hands to the dough. Bring the flour from the edges of the bowl towards the center and push it down with your knuckles. Continue until the dough becomes smooth and uniform.
Step 6: Oil and Rest the Dough
Rub the remaining oil (approximately 0.5 teaspoon) all over the surface of the dough. Cover the bowl with a clean tea towel and let the dough rest for .
Step 7: Second Kneading
After the 10-minute resting period, the dough again for a few minutes until it is even smoother and more pliable.
Step 8: Prepare Rolling Surface
Place a tea towel or a microfiber cloth under your rolling board (or directly on a clean countertop) to prevent it from sliding around while you roll the rotis.
Step 9: Shape Dough into a Log
Place the rested dough on the rolling board and roll it into an elongated log shape.
Step 10: Divide the Dough
Divide the dough log into 8 or 9 equal-sized pieces. These will be your individual roti portions.
Step 11: Form Dough Balls
Take one piece of the divided dough, flatten it slightly, then bring the edges towards the top and pinch them together to seal. Push it down, roll it into a smooth ball between your palms, and then flatten it slightly into a disc shape.
Step 12: Dust Dough Balls
Lightly coat the flattened dough ball with dry flour on both sides. Place it in a dish. Repeat this process for all the remaining dough pieces.
Step 13: Cover Dough Balls
Once all dough pieces are formed and dusted, cover the dish with a tea towel and set it aside while you prepare to cook.
Step 14: Preheat Griddle
Place a griddle or a non-stick fry pan on your stovetop and preheat it over medium heat.
Step 15: Prepare Serving Plate
Line a serving plate with a clean tea towel, and then place a paper towel on top of the tea towel. This setup will help keep the cooked rotis warm and soft.
Step 16: Roll Out Roti
Take one of the dusted dough balls, place it on your rolling board, and sprinkle a little more dry flour on both sides. Flatten it gently with your palm, then use a rolling pin to roll it into a thin, round circle. Don't worry if the shape isn't perfectly round; it will still taste delicious.
Step 17: Cook First Side
Carefully place one rolled roti onto the preheated griddle. Cook it until small bubbles start to appear on the top surface, which usually takes about .
Step 18: Flip and Cook Second Side
Using a spatula, flip the roti over to the other side. Cook for approximately until you see light golden-brown spots forming on the surface.
Step 19: Puff the Roti
Flip the roti over once more. Take a soft tea towel and gently press it lightly on the top surface of the roti. This action will help the roti to puff up, indicating it's cooking through evenly.
Step 20: Cook Until Golden
Flip the roti again and cook for another , or until both sides are nicely golden brown with darker spots.
Step 21: Remove and Oil
Once cooked, remove the roti from the griddle and place it on the prepared serving plate. Immediately apply some ghee or oil to both sides of the hot roti using a pastry brush.
Step 22: Repeat Process
Continue the process of rolling, cooking, and oiling with the remaining dough pieces until all rotis are made.
Step 23: Serve and Store
Your quick and easy rotis are now ready to be served warm or cold with any of your favorite curries. Leftover rotis can be stored in a sealed container for up to 3 days to maintain freshness.
Pro Tips
• To get a perfect measurement every time, take a heaped cup of flour, then use something flat (like a knife) to lightly push it down and scrape off the excess flour.
• Leftover rotis can be kept in a sealed container for up to 3 days.
• Place a tea towel or microfiber cloth under your rolling board to stop it from moving while rolling the dough.
Storage & Leftovers
How to keep what you don't finish — pulled straight from the recipe.
- Storeup to 3 days
Leftover rotis can be kept in a sealed container for up to 3 days.
- Storeup to 3 days
Leftover rotis can be stored in a sealed container for up to 3 days to maintain freshness.
Your Notes
Jot down your tweaks — swaps you tried, cook-time adjustments, family reactions. Saved on this device only, and printed with the recipe.
More from Anita's Guide to Simple and Easy Cooking
Other recipes converted from Anita's Guide to Simple and Easy Cooking's cooking videos.
Quick & Easy Roti
Cuisine
Indian · North Indian
Prep + Cook Time
30 Minutes
Difficulty Level
Easy
Quick & Easy Roti
Cuisine
Indian · North Indian
Prep + Cook Time
40 Minutes
Difficulty Level
Easy
You might also like
Other recipes in the same cuisine, meal type, or style — ready to cook whenever you are.
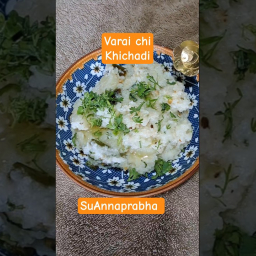
Barnyard Millet Khichadi – Healthy & Easy
Cuisine
Indian · North Indian
Prep + Cook Time
30 Minutes
Difficulty Level
Easy

Poori Kurma - Restaurant Style
Cuisine
Indian · South Indian
Prep + Cook Time
45 Minutes
Difficulty Level
Medium

Kerala Sadya Sambar
Cuisine
Indian · South Indian
Prep + Cook Time
1 hr
Difficulty Level
Medium
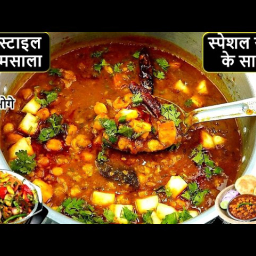
Quick & Easy Chole (Chickpea Curry) with Paneer
Cuisine
Indian · North Indian
Prep + Cook Time
45 Minutes
Difficulty Level
Medium

Dahi Wale Chole – Yogurt Chickpea Curry
Cuisine
Indian · North Indian
Prep + Cook Time
35 Minutes
Difficulty Level
Easy

Creamy Curd Rice - South Indian Style
Cuisine
Indian · South Indian
Prep + Cook Time
25 Minutes
Difficulty Level
Comments
Sign in to leave a comment on this recipe.
Loading comments...