Fullmeals
HomeExploreCreatorsPantry MatchSurprise Me
HomeExploreCreatorsPantry MatchSurprise MeShopping ListMy Favorites
Fullmeals

Fullmeals helps you cook without watching by converting cooking videos into simple, step-by-step recipes designed for real kitchens.

cook@fullmeals.com

Quick Links

  • How it Works
  • Categories
  • Explore Recipes
  • RSS Feed

Legal

  • Terms of Use
  • Privacy Policy

© 2026 Fullmeals. All rights reserved.

Fullmeals

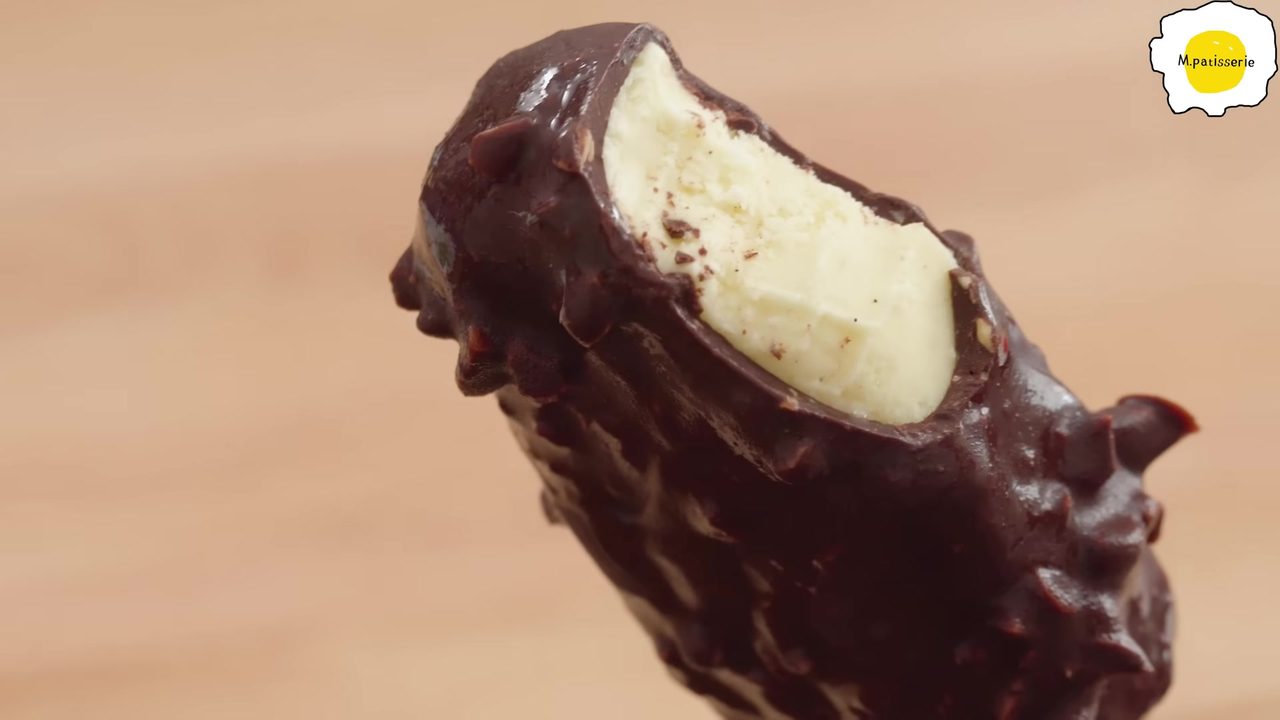
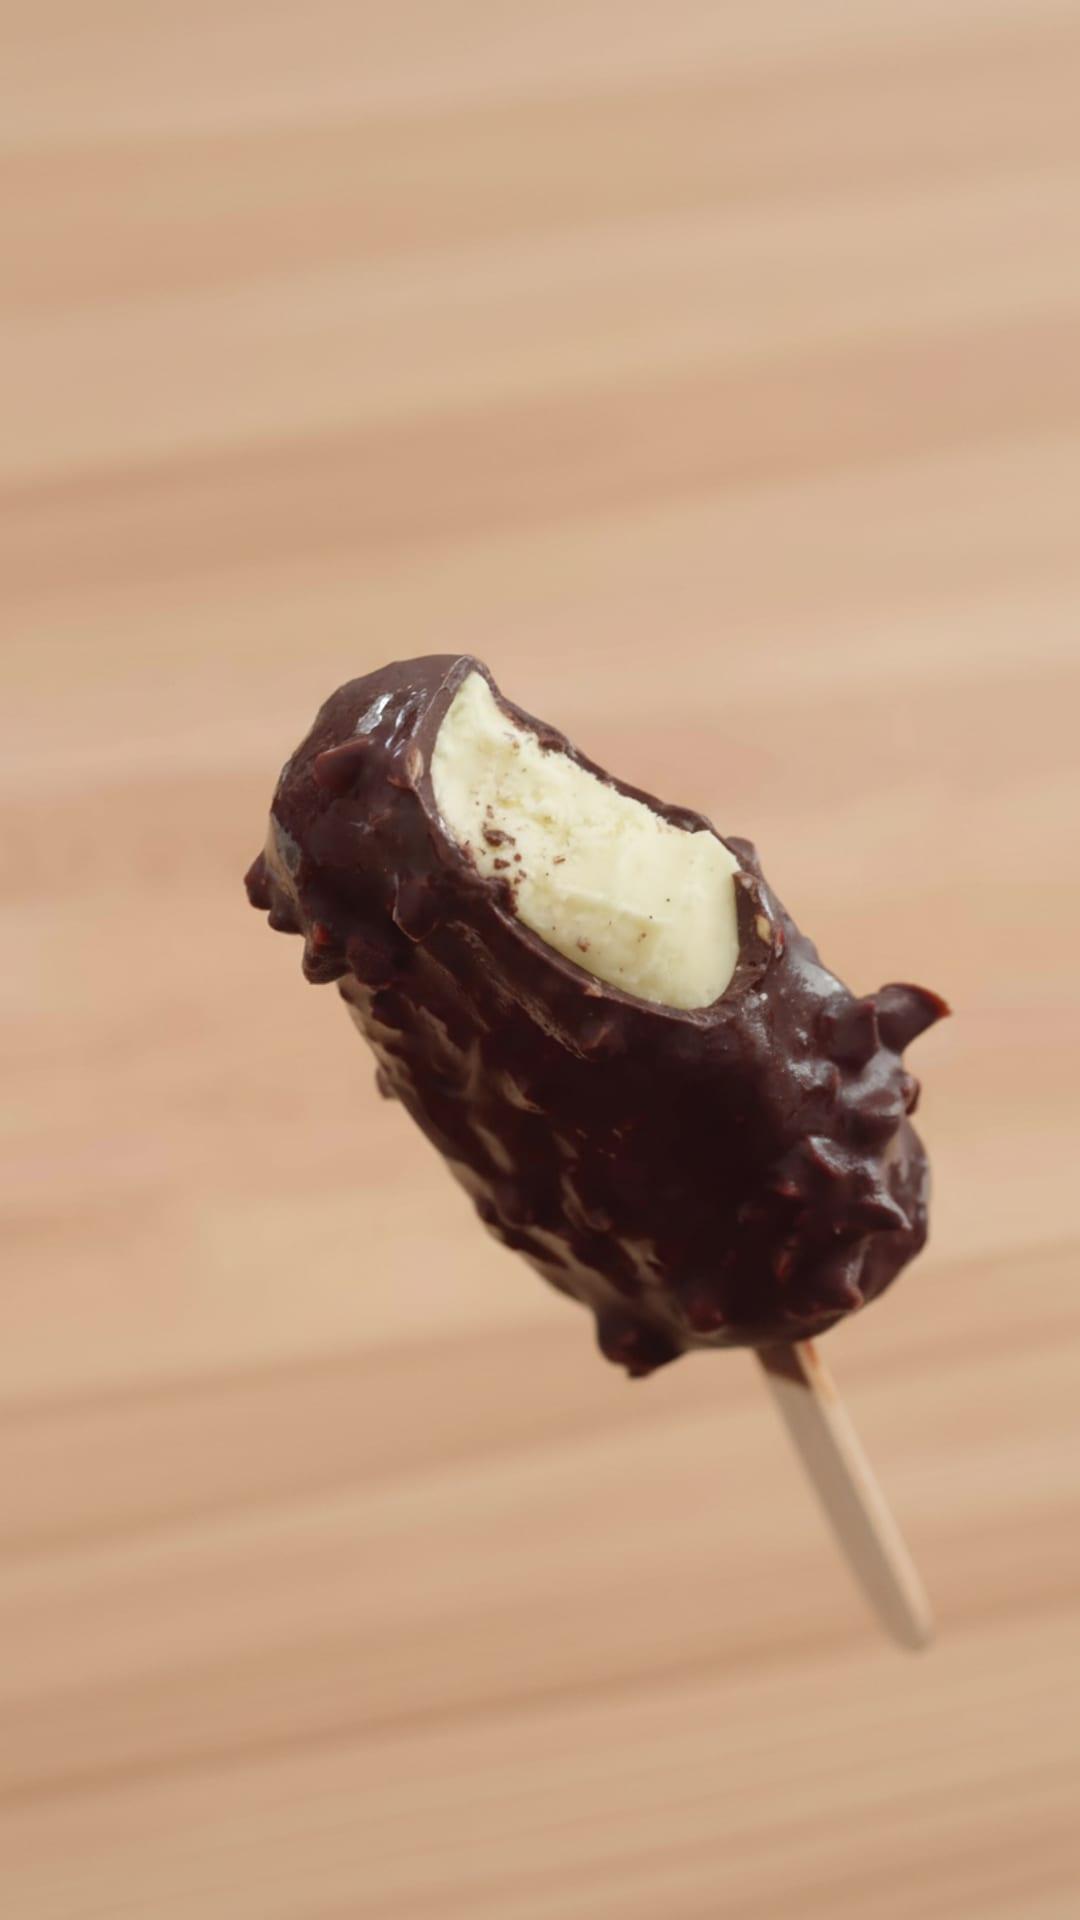
Homemade Ice Cream Bars (Vanilla, Matcha, Raspberry)

Recipe by M.paikisserie
  • Ready in655 min
  • Prep60 min
  • Cook10 min
  • CuisineWestern · Dessert
  • Serves12 Bars
  • Calories~400 kcal
Homemade Ice Cream Bars (Vanilla, Matcha, Raspberry)

Ingredients

Custard Sauce

  • 6Egg yolks
  • 450gMilk
  • 150gSugar

Ice Cream Base (per flavor)

  • 1/3 of totalCustard Sauce
  • 130gWhipped cream (38%)

Vanilla Ice Cream Flavoring

  • someVanilla seeds

Matcha Ice Cream Flavoring

  • 3gMatcha

Raspberry Ice Cream Flavoring

  • 30gRaspberry puree

Dark Chocolate Coating

  • 300gDark chocolate
  • 30gMelted cocoa butter
  • someChopped hazelnuts

Raspberry White Chocolate Coating

  • 300gMelted white chocolate
  • 35gMelted cocoa butter
  • 5gFreeze-dried raspberry chopped

Matcha White Chocolate Coating

  • 300gMelted white chocolate
  • 35gMelted cocoa butter
  • 4gMatcha

Step-by-Step Instructions

  1. 1.Prepare Custard Sauce

    In a heatproof bowl, combine 6 egg yolks, 450g milk, and 150g sugar. Whisk thoroughly until all ingredients are well combined and the mixture is slightly frothy.

  2. 2.Heat Custard Mixture

    Place the bowl over a pot of simmering water (creating a bain-marie) or directly on low heat. Continuously stir the mixture with a spatula and monitor the temperature with a thermometer. Heat until the mixture reaches 82°C (180°F), ensuring the eggs are cooked and the custard thickens slightly.

  3. 3.Cool Custard

    Remove the custard from the heat. Cover the bowl and refrigerate for 2 hours to allow it to cool completely and set.

  4. 4.Strain Custard

    After chilling, strain the custard sauce through a fine-mesh sieve into a clean bowl. This step removes any potential lumps and ensures a perfectly smooth consistency for the ice cream base.

  5. 5.Divide Custard Sauce

    Divide the strained custard sauce equally into 3 separate bowls. Each bowl will be used for a different ice cream flavor.

  6. 6.Flavor Vanilla Custard

    To the first bowl of custard, add some vanilla seeds. Whisk gently until the vanilla seeds are evenly distributed throughout the custard.

  7. 7.Flavor Matcha Custard

    To the second bowl of custard, add 3g of matcha powder. Whisk vigorously until the matcha is fully incorporated, and the custard has a uniform green color and smooth texture.

  8. 8.Flavor Raspberry Custard

    To the third bowl of custard, add 30g of raspberry puree. Whisk until the puree is thoroughly mixed in, giving the custard a consistent pink hue.

  9. 9.Whip Cream

    In a separate large bowl, using an electric mixer, whip 390g of 38% fat whipped cream until soft peaks form. Be careful not to over-whip.

  10. 10.Combine Vanilla Ice Cream Base

    Divide the whipped cream into three equal portions (approximately 130g each). Gently fold one portion of the whipped cream into the vanilla-flavored custard until just combined. Do not overmix to maintain the airy texture.

  11. 11.Combine Matcha Ice Cream Base

    Gently fold another portion of whipped cream (130g) into the matcha-flavored custard until just combined, ensuring a smooth and even mixture.

  12. 12.Combine Raspberry Ice Cream Base

    Gently fold the remaining portion of whipped cream (130g) into the raspberry-flavored custard until just combined, creating a light and fluffy ice cream base.

  13. 13.Fill Molds (Vanilla)

    Insert wooden popsicle sticks into the silicone ice cream molds. Pour the vanilla ice cream mixture into 4 molds, filling them completely to the top.

  14. 14.Cover Molds (Vanilla)

    Carefully place the silicone lid over the vanilla ice cream molds, ensuring the popsicle sticks are securely held in place.

  15. 15.Fill Molds (Raspberry)

    Pour the raspberry ice cream mixture into another 4 molds, filling them completely.

  16. 16.Cover Molds (Raspberry)

    Place the silicone lid over the raspberry ice cream molds.

  17. 17.Fill Molds (Matcha)

    Pour the matcha ice cream mixture into the remaining 4 molds, filling them completely.

  18. 18.Cover Molds (Matcha)

    Place the silicone lid over the matcha ice cream molds.

  19. 19.Freeze Ice Cream Bars

    Place all the filled molds in the freezer for at least 8 hours, or until the ice cream bars are completely solid and firm.

  20. 20.Prepare Dark Chocolate Coating

    In a heatproof bowl set over hot water (bain-marie), melt 300g dark chocolate, stirring until smooth and fully melted. Add 30g melted cocoa butter and some chopped hazelnuts, then mix well until evenly combined. Keep warm for dipping.

  21. 21.Prepare Raspberry White Chocolate Coating

    In another heatproof bowl set over hot water, melt 300g white chocolate, stirring until smooth. Add 35g melted cocoa butter and 5g freeze-dried chopped raspberry, then mix well until evenly combined. Keep warm for dipping.

  22. 22.Prepare Matcha White Chocolate Coating

    In a small bowl, mix 4g matcha powder with 35g melted cocoa butter until smooth. In a separate heatproof bowl set over hot water, melt 300g white chocolate, stirring until smooth. Add the matcha-cocoa butter mixture to the melted white chocolate and mix until evenly colored and smooth. Keep warm for dipping.

  23. 23.Unmold Ice Cream Bars

    Once the ice cream bars are thoroughly frozen, carefully unmold them by gently pushing them out of the flexible silicone molds.

  24. 24.Coat Vanilla Ice Cream Bar with Dark Chocolate

    Dip a vanilla ice cream bar into the prepared dark chocolate coating, ensuring it is fully covered. Hold it over the coating for a few seconds to allow any excess chocolate to drip off.

  25. 25.Coat Vanilla Ice Cream Bar with Raspberry White Chocolate

    Dip another vanilla ice cream bar into the raspberry white chocolate coating, ensuring full coverage. Let excess coating drip off.

  26. 26.Coat Matcha Ice Cream Bar with Matcha White Chocolate

    Dip a matcha ice cream bar into the matcha white chocolate coating, ensuring full coverage. Allow any excess coating to drip off.

  27. 27.Final Preservation

    Place all the coated ice cream bars on a tray lined with parchment paper. Immediately transfer them back to the freezer for frozen preservation until ready to serve.
Printed from Fullmeals.com — turn any cooking video into a recipe.

Homemade Ice Cream Bars (Vanilla, Matcha, Raspberry)

Ready in

655 mins

Cuisine

Western · Dessert

Prep Time

60 min

Cook Time

10 min

Serving

12 Bars

Calories / Serving

~400 kcal
Recipe by M.paikisserie on YouTube
Adjust Servings
Measurements
Tap an ingredient to mark it ready0 of 17 ready
All Ingredients

Custard Sauce

All Ingredients

Ice Cream Base (per flavor)

All Ingredients

Vanilla Ice Cream Flavoring

All Ingredients

Matcha Ice Cream Flavoring

All Ingredients

Raspberry Ice Cream Flavoring

All Ingredients

Dark Chocolate Coating

All Ingredients

Raspberry White Chocolate Coating

All Ingredients

Matcha White Chocolate Coating

Step-by-Step Instructions

Follow each step to make the recipe successfully.

  1. 1

    Prepare Custard Sauce

    In a heatproof bowl, combine 6 egg yolks, 450g milk, and 150g sugar. thoroughly until all ingredients are well combined and the mixture is slightly frothy.

  2. 2

    Heat Custard Mixture

    Place the bowl over a pot of water (creating a bain-marie) or directly on low heat. Continuously stir the mixture with a spatula and monitor the temperature with a thermometer. Heat until the mixture reaches 82°C (≈180°F) (approximately 180°F) (180°F (≈80°C) (approximately 80°C)), ensuring the eggs are cooked and the custard thickens slightly.

  3. 3

    Cool Custard

    Remove the custard from the heat. Cover the bowl and refrigerate for to allow it to cool completely and set.

  4. 4

    Strain Custard

    After chilling, strain the custard sauce through a fine-mesh sieve into a clean bowl. This step removes any potential lumps and ensures a perfectly smooth consistency for the ice cream base.

  5. 5

    Divide Custard Sauce

    Divide the strained custard sauce equally into 3 separate bowls. Each bowl will be used for a different ice cream flavor.

  6. 6

    Flavor Vanilla Custard

    To the first bowl of custard, add some vanilla seeds. gently until the vanilla seeds are evenly distributed throughout the custard.

  7. 7

    Flavor Matcha Custard

    To the second bowl of custard, add 3g of matcha powder. vigorously until the matcha is fully incorporated, and the custard has a uniform green color and smooth texture.

  8. 8

    Flavor Raspberry Custard

    To the third bowl of custard, add 30g of raspberry puree. until the puree is thoroughly mixed in, giving the custard a consistent pink hue.

  9. 9

    Whip Cream

    In a separate large bowl, using an electric mixer, 390g of 38% fat cream until soft peaks form. Be careful not to over-.

  10. 10

    Combine Vanilla Ice Cream Base

    Divide the cream into three equal portions (approximately 130g each). Gently fold one portion of the cream into the vanilla-flavored custard until just combined. Do not overmix to maintain the airy texture.

  11. 11

    Combine Matcha Ice Cream Base

    Gently fold another portion of cream (130g) into the matcha-flavored custard until just combined, ensuring a smooth and even mixture.

  12. 12

    Combine Raspberry Ice Cream Base

    Gently fold the remaining portion of cream (130g) into the raspberry-flavored custard until just combined, creating a light and fluffy ice cream base.

  13. 13

    Fill Molds (Vanilla)

    Insert wooden popsicle sticks into the silicone ice cream molds. Pour the vanilla ice cream mixture into 4 molds, filling them completely to the top.

  14. 14

    Cover Molds (Vanilla)

    Carefully place the silicone lid over the vanilla ice cream molds, ensuring the popsicle sticks are securely held in place.

  15. 15

    Fill Molds (Raspberry)

    Pour the raspberry ice cream mixture into another 4 molds, filling them completely.

  16. 16

    Cover Molds (Raspberry)

    Place the silicone lid over the raspberry ice cream molds.

  17. 17

    Fill Molds (Matcha)

    Pour the matcha ice cream mixture into the remaining 4 molds, filling them completely.

  18. 18

    Cover Molds (Matcha)

    Place the silicone lid over the matcha ice cream molds.

  19. 19

    Freeze Ice Cream Bars

    Place all the filled molds in the freezer for at least , or until the ice cream bars are completely solid and firm.

  20. 20

    Prepare Dark Chocolate Coating

    In a heatproof bowl set over hot water (bain-marie), melt 300g dark chocolate, stirring until smooth and fully melted. Add 30g melted cocoa butter and some chopped hazelnuts, then mix well until evenly combined. Keep warm for dipping.

  21. 21

    Prepare Raspberry White Chocolate Coating

    In another heatproof bowl set over hot water, melt 300g white chocolate, stirring until smooth. Add 35g melted cocoa butter and 5g freeze-dried chopped raspberry, then mix well until evenly combined. Keep warm for dipping.

  22. 22

    Prepare Matcha White Chocolate Coating

    In a small bowl, mix 4g matcha powder with 35g melted cocoa butter until smooth. In a separate heatproof bowl set over hot water, melt 300g white chocolate, stirring until smooth. Add the matcha-cocoa butter mixture to the melted white chocolate and mix until evenly colored and smooth. Keep warm for dipping.

  23. 23

    Unmold Ice Cream Bars

    Once the ice cream bars are thoroughly frozen, carefully unmold them by gently pushing them out of the flexible silicone molds.

  24. 24

    Coat Vanilla Ice Cream Bar with Dark Chocolate

    Dip a vanilla ice cream bar into the prepared dark chocolate coating, ensuring it is fully covered. Hold it over the coating for a few seconds to allow any excess chocolate to drip off.

  25. 25

    Coat Vanilla Ice Cream Bar with Raspberry White Chocolate

    Dip another vanilla ice cream bar into the raspberry white chocolate coating, ensuring full coverage. Let excess coating drip off.

  26. 26

    Coat Matcha Ice Cream Bar with Matcha White Chocolate

    Dip a matcha ice cream bar into the matcha white chocolate coating, ensuring full coverage. Allow any excess coating to drip off.

  27. 27

    Final Preservation

    Place all the coated ice cream bars on a tray lined with parchment paper. Immediately transfer them back to the freezer for frozen preservation until ready to serve.
Before You Cook

Helpful details before you start
Ingredient SubstitutionsMissing something? View suitable alternatives.
View 3 swaps
  • No Egg?

    • 1 tbsp ground flax + 3 tbsp water (rest 5 min) — Per egg, best in baking.
    • 1/4 cup unsweetened applesauce — Per egg, in sweet baked goods.
    • 1/4 cup silken tofu, blended — Per egg.
  • No Milk?

    • Unsweetened almond / soy / oat milk (1:1)
    • 1/2 cup evaporated milk + 1/2 cup water (per 1 cup)
  • No Butter?

    • 3/4 the amount of olive oil (for cooking, not baking)
    • Equal parts ghee — Slightly nuttier flavor.
    • Equal parts coconut oil (in baking)
Ingredient Substitutions
  • No Egg?

    • 1 tbsp ground flax + 3 tbsp water (rest 5 min) — Per egg, best in baking.
    • 1/4 cup unsweetened applesauce — Per egg, in sweet baked goods.
    • 1/4 cup silken tofu, blended — Per egg.
  • No Milk?

    • Unsweetened almond / soy / oat milk (1:1)
    • 1/2 cup evaporated milk + 1/2 cup water (per 1 cup)
  • No Butter?

    • 3/4 the amount of olive oil (for cooking, not baking)
    • Equal parts ghee — Slightly nuttier flavor.
    • Equal parts coconut oil (in baking)
AllergensThis recipe contains dairy and eggs and nuts.
DairyEggsNuts

Plan Ahead

Complete this step earlier to save time later.

  • Step3
    Cool Custard2 hours

    Remove the custard from the heat. Cover the bowl and refrigerate for 2 hours to allow it to cool completely and set.

    View Step 3
  • Step19
    Freeze Ice Cream Bars8 hours

    Place all the filled molds in the freezer for at least 8 hours, or until the ice cream bars are completely solid and firm.

    View Step 19

Storage & Leftovers

Keep your leftovers fresh and ready to enjoy.

  • RefrigerateAt least 2 hours

    Refrigerate the custard for at least 2 hours to cool completely before mixing with whipped cream.

  • RefrigerateUp to 2 hours

    Cover the bowl and refrigerate for 2 hours to allow it to cool completely and set.

  • FreezeAt least 8 hours

    Freeze the ice cream bars for at least 8 hours for them to set firmly.

  • FreezeAt least 8 hours

    Place all the filled molds in the freezer for at least 8 hours, or until the ice cream bars are completely solid and firm.

Variations

Simple ways to adapt this recipe.

  • 1
    Experiment with different fruit purees

    Experiment with different fruit purees like strawberry or mango.

  • 2
    Substitute hazelnuts with other nutsIngredient swap

    Substitute hazelnuts with other nuts like almonds or pistachios for the chocolate coating.

  • 3
    Add different flavorings to the white chocolate coatingCustomise

    Such as coffee extract or orange zest.

Helpful Tips

Small details that can improve the final result.

  • 1
    TipEnsure Custard Is Heated to

    Ensure custard is heated to 82°C (180°F) to properly cook the eggs and thicken the mixture.

  • 2
    TipRefrigerate the Custard for at

    Refrigerate the custard for at least 2 hours to cool completely before mixing with whipped cream.

  • 3
    TipFreeze the Ice Cream Bars

    Freeze the ice cream bars for at least 8 hours for them to set firmly.

  • 4
    TipUse a Deep

    Narrow container for dipping the ice cream bars to ensure even coating.

Was this recipe helpful?

Comments (0)

Sign in to leave a comment on this recipe.

Loading comments...

You might also like

Other recipes in the same cuisine, meal type, or style — ready to cook whenever you are.

Wheat Flour Peda (Atta Peda) - Easy Homemade Sweet

Wheat Flour Peda (Atta Peda) - Easy Homemade Sweet

Cuisine

Indian · North Indian

Prep + Cook Time

40 Minutes

Difficulty Level

Easy

Thambittu Ladoo – Healthy & Easy Sweet

Thambittu Ladoo – Healthy & Easy Sweet

Cuisine

Indian · South Indian

Prep + Cook Time

30 Minutes

Difficulty Level

Easy

Authentic Vada Pav - Mumbai Street Food Style

Authentic Vada Pav - Mumbai Street Food Style

Cuisine

Indian · Maharashtrian Street Food

Prep + Cook Time

1 hr 45 min

Difficulty Level

Medium

Mushroom Galouti Kebab Recipe

Mushroom Galouti Kebab Recipe

Cuisine

Indian · North Indian

Prep + Cook Time

50 Minutes

Difficulty Level

Medium

Aloo Matar - Indian Potato and Peas Curry

Aloo Matar - Indian Potato and Peas Curry

Cuisine

Indian · North Indian

Prep + Cook Time

50 Minutes

Difficulty Level

Easy

Onion Fritters (Pakoda) – Indian Style

Onion Fritters (Pakoda) – Indian Style

Cuisine

Indian

Prep + Cook Time

30 Minutes

Difficulty Level

Easy