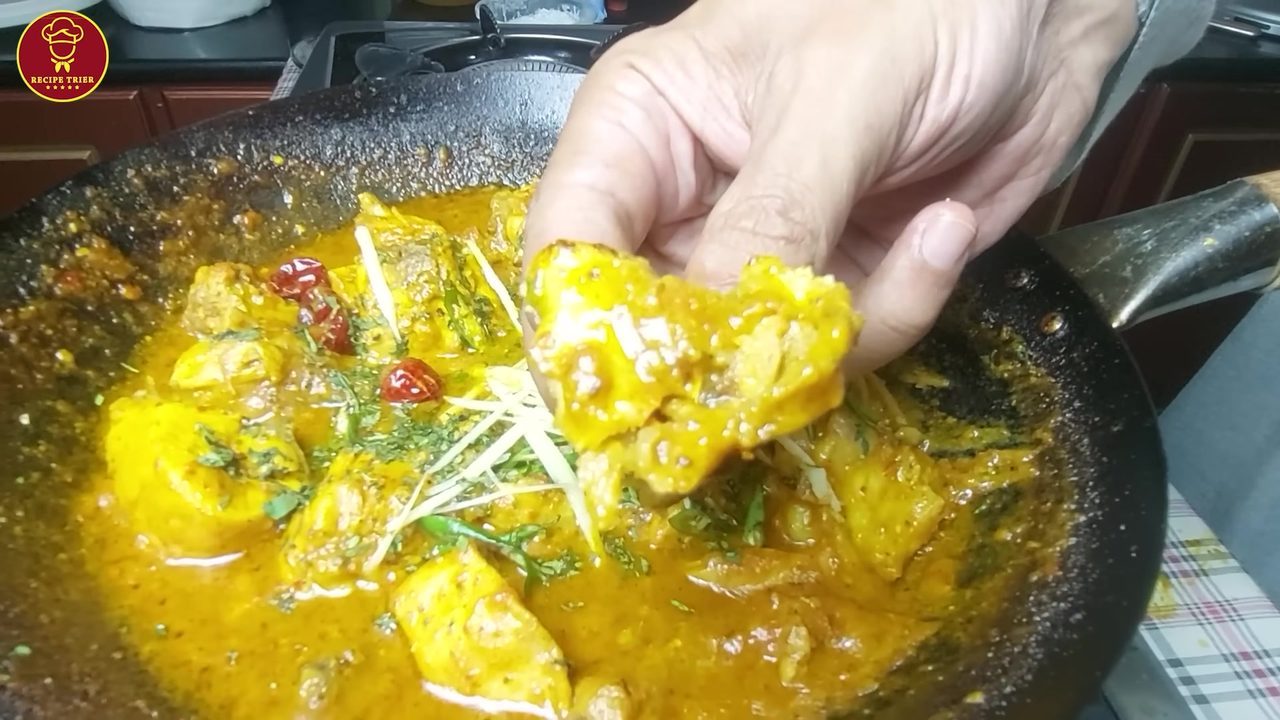
Butt Karahi (Chicken Karahi)
Recipe by Recipe Trier
Ingredients
For Pressure Cooking
- 1300 gChicken
- 2, slicedOnions
- 4 large, halvedTomatoes
- 4-5 tbsp (thin consistency)Ginger-Garlic Paste
- 1/4 cupMustard Oil
- 1.5 tspSalt
- 1 tspCrushed Red Chili (Dharra Mirch)
- 0.5 tspTurmeric Powder (Haldi)
- 1 glassWater
For Finishing in Wok
- 3 tbspThick Yogurt
- 1 tbspCumin Powder (Darra Darra Zeera)
- 1 tbspCoriander Powder (Pisa Hua Dhaniya)
- 1/4 tspGaram Masala
- 1/4 tspBlack Pepper
- 4-5Whole Dried Red Chilies (Sabut Gol Mirch)
For Garnish
- choppedFresh Coriander
- slicedGreen Chilies
- juliennedGinger
Step-by-Step Instructions
- 1.Prepare for Pressure Cooking
Place a pressure cooker on the stove and turn on the heat.
- 2.Add Base Ingredients
Add 2 sliced onions, 4 large halved tomatoes, and 1300g of chicken to the pressure cooker.
- 3.Add Spices and Oil
Pour in 4-5 tablespoons of thin ginger-garlic paste, 1/4 cup of mustard oil, 1.5 teaspoons of salt, 1 teaspoon of crushed red chili (dharra mirch), and 0.5 teaspoon of turmeric powder (haldi).
- 4.Add Water and Mix
Add 1 glass of water to the mixture and mix all ingredients thoroughly with a ladle.
- 5.Pressure Cook
Cover the pressure cooker with its lid, place the whistle, and pressure cook on high heat for exactly 4 minutes after the pressure builds up.
- 6.Release Pressure and Transfer
After 4 minutes, turn off the heat. Carefully release the pressure from the cooker and then open the lid. Transfer the entire cooked mixture from the pressure cooker into a large wok (karahi) placed over medium-high heat.
- 7.Remove Tomato Skins and Mash
Using tongs, carefully remove the skins from the softened tomatoes. Then, gently mash the tomatoes with a spatula into the gravy.
- 8.Evaporate Water and Stir
Continue cooking the karahi, stirring frequently with a flat spatula (khoncha) from underneath the chicken pieces to ensure they don't break. Cook until most of the excess water has evaporated and the gravy starts to thicken.
- 9.Add Ground Spices
Once the water has significantly reduced, add 1 tablespoon of cumin powder (darra darra zeera) and 1 tablespoon of coriander powder (pisa hua dhaniya). Mix well to combine the spices.
- 10.Add Yogurt and Thicken Gravy
Add 3 tablespoons of thick yogurt to the karahi. Stir continuously until the yogurt is fully incorporated and the gravy reaches a thick, desired consistency.
- 11.Final Seasoning and Chilies
Sprinkle 1/4 teaspoon of garam masala and 1/4 teaspoon of black pepper into the karahi. Add 4-5 whole dried red chilies (sabut gol mirch) and mix everything for another minute.
- 12.Garnish and Serve
Turn off the heat. Garnish the Butt Karahi generously with chopped fresh coriander, sliced green chilies, and julienned ginger. Serve hot with fresh roti or naan.


Comments (0)
Sign in to leave a comment on this recipe.
Loading comments...