Banana Halwa
Summary
- This recipe transforms overripe bananas into a delicious and chewy halwa, sweetened with jaggery and enriched with ghee and peanuts. It's a unique and delightful way to enjoy bananas, offering a rich and satisfying dessert.
All Ingredients - Main Ingredients
- Ripe Bananas 8-10 medium
- Ghee 1/3 cup
- Jaggery 1 cup
- Water 1/4 cup
- Chopped Peanuts 1/4 cup
Tools You'll Need
- Frying pan
- Pan
- Cake pan
- Blender
- Spatula
- Cutting board
Plan Ahead
Up to 1 hr of hands-off time you can shift to earlier.
- Step 7 · Refrigerate1 hr
…or a similar mold. Press it down evenly with a spatula. Place the tin in the refrigerator for at least 1 hour to allow the halwa to set completely.
Don't have an ingredient? Try these swaps
No Ghee?
- Unsalted butter (1:1)
- Neutral oil (1:1, lacks the toasted note)
No Jaggery?
- Dark brown sugar (1:1)
- Muscovado sugar (1:1)
⚠ Contains Allergens
Step-by-Step Instructions
Step 1: Prepare Bananas
Peel all the ripe bananas and chop them into smaller pieces. Transfer the chopped bananas into a blender.
Step 2: Blend Bananas
Blend the chopped bananas into a smooth, thick paste. Ensure there are no lumps.
Step 3: Cook Banana Paste
Heat 1/4 cup of ghee in a large non-stick pan over medium heat. Once the ghee is melted, pour the banana paste into the pan. Cook the banana paste for about , stirring continuously, until it becomes shiny and slightly thickens.
Step 4: Prepare Jaggery Syrup
In a separate small pan, add 1 cup of jaggery and 1/4 cup of water. Heat over medium-low heat, stirring until the jaggery completely melts and forms a smooth syrup.
Step 5: Combine and Cook Halwa
Pour the jaggery syrup into the banana paste in the large pan. Mix well until combined. Continue cooking and stirring the mixture. As the mixture cooks and thickens, add 1-2 tablespoons of ghee periodically (around 0:41 and 0:43) to prevent sticking and enhance the texture. Cook until the halwa becomes very thick, sticky, and starts to pull away from the sides of the pan, which should take about .
Step 6: Add Peanuts
Once the halwa reaches the desired thick and sticky consistency, add 1/4 cup of chopped peanuts. Mix them thoroughly into the halwa.
Step 7: Set the Halwa
Transfer the hot halwa mixture into a greased square cake tin or a similar mold. Press it down evenly with a spatula. Place the tin in the refrigerator for at least to allow the halwa to set completely.
Step 8: Cut and Serve
Once set, remove the halwa from the refrigerator. Invert it onto a cutting board and cut it into desired shapes, such as squares or bars. Serve the delicious banana halwa.
Pro Tips
• Use very ripe bananas for the best flavor and sweetness.
• Stir the halwa continuously to prevent it from sticking to the pan and burning.
• Adjust the amount of jaggery according to your sweetness preference.
Variations
• Add a pinch of cardamom powder for enhanced flavor.
• Incorporate other chopped nuts like cashews or almonds.
• For a richer taste, add a splash of coconut milk during cooking.
Storage & Leftovers
How to keep what you don't finish — pulled straight from the recipe.
- Refrigerateup to 1 hour
Place the tin in the refrigerator for at least 1 hour to allow the halwa to set completely.
You might also like
Other recipes in the same cuisine, meal type, or style — ready to cook whenever you are.
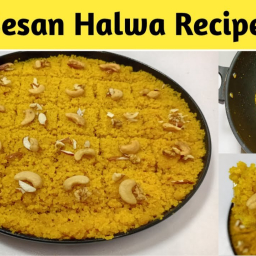
Besan Halwa Recipe - Indian Sweet
Cuisine
Indian · North Indian
Prep + Cook Time
1 hr
Difficulty Level
Medium

Sooji ka Tukdi Halwa (Semolina Fudge)
Cuisine
Indian · South Asian
Prep + Cook Time
30 Minutes
Difficulty Level
Easy

Gajar Halwa (Carrot Halwa) – Indian Style
Cuisine
Indian · North Indian
Prep + Cook Time
55 Minutes
Difficulty Level
Medium

Quick & Easy Indian Dinner Party Menu
Cuisine
Indian · North Indian
Prep + Cook Time
2 hr
Difficulty Level
Medium

Puri Halwa with Sprouts Curry – Indian Breakfast/Snack
Cuisine
Indian · North Indian
Prep + Cook Time
55 Minutes
Difficulty Level
Medium

Palak Paneer Recipe
Cuisine
Indian · North Indian
Prep + Cook Time
45 Minutes
Difficulty Level
Comments
Sign in to leave a comment on this recipe.
Loading comments...