Roti Making - Indian Flatbread
Summary
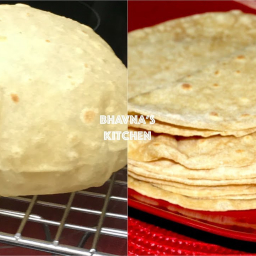
- Learn how to make soft and pliable Indian roti (chapati) from scratch. This video covers preparing the dough, rolling, and baking the rotis on a pan until they puff up. Perfect for beginners, this recipe provides tips for achieving delicious homemade flatbread.
Video Chapters
Jump straight to any step in the video.
All Ingredients - Main Ingredients
- Wheat Flour (Chapati Atta) 2 cups
- Oil 1 tbsp
- Water 1 cup + 2 tbsp
- Dry Flour as needed
- Ghee (Clarified Butter) as needed
Tools You'll Need
- Pan
- Tawa
- Mixing bowl
- Bowl
- Rolling pin
- Tongs
Don't have an ingredient? Try these swaps
No Butter?
- 3/4 the amount of olive oil (for cooking, not baking)
- Equal parts ghee — Slightly nuttier flavor.
- Equal parts coconut oil (in baking)
No Ghee?
- Unsalted butter (1:1)
- Neutral oil (1:1, lacks the toasted note)
⚠ Contains Allergens
Step-by-Step Instructions
Step 1: Prepare the Dough
In a large bowl, combine 2 cups of wheat flour (chapati atta) and 1 tablespoon of oil (optional). Gradually add approximately 1 cup and 2 tablespoons of water, continuously until a soft but pliable dough forms. The dough should not be too soft or too hard. If the dough becomes sticky, apply a little oil to your hands and continue until it's smooth and no longer sticks to your hands or the bowl.
Step 2: Rest the Dough
Cover the dough with a clean cloth or lid and for about . This resting period helps the gluten relax, making the dough easier to roll. Alternatively, you can proceed to rolling immediately.
Step 3: Portion and Coat Dough
After the dough has rested, pinch off a lemon-sized portion of the dough and gently flatten it into a small disc. Take some dry flour (wheat, rice, or all-purpose) and lightly coat the dough ball with it on all sides.
Step 4: Roll the Roti
Place the floured dough ball on a rolling board. Using a rolling pin, start rolling the dough, applying even pressure from the sides, until it forms a thin, round disc. It doesn't have to be perfectly round, as rolling perfect circles takes practice. If the dough starts sticking to the board or rolling pin, dust it with a little more dry flour, but try to use as little as possible.
Step 5: Heat the Pan
Place a flat pan (tava) on a rack over a medium-heat burner. If you have a gas stove, you can place the pan directly on the burner. Allow the pan to heat up until it's slightly hot.
Step 6: Bake the Roti (First Side)
Carefully place the rolled roti onto the hot pan. Let it bake for about until the color changes slightly and you observe a few small bubbles forming on the surface. Rotis bake quickly, so keep an eye on them.
Step 7: Bake the Roti (Second Side)
Using tongs (recommended for beginners to avoid burns), carefully flip the roti to the other side. Let it bake for another until a few brown spots appear on this side.
Step 8: Puff the Roti
Once brown spots appear on the second side, increase the heat to high. Carefully transfer the roti from the pan directly onto the rack over the high heat (or directly over the gas flame if using a gas stove) to allow it to puff up. It is perfectly normal if not all rotis puff completely.
Step 9: Store Baked Rotis
Once puffed, immediately remove the roti from the heat. Place it on a paper towel-lined basket or an airtight container with holes to allow to escape initially. Continue rolling and baking the remaining rotis following the same steps.
Step 10: Apply Ghee
Take a freshly baked roti and apply a small amount of ghee (clarified butter) on one side. Place another baked roti on top of it and gently rub them together. This helps to evenly spread the ghee and keeps the rotis soft.
Step 11: Keep Warm and Stack
Continue stacking the rotis on top of each other in an airtight container. This helps to retain their warmth and moisture, preventing them from drying out. Since rotis are delicate and thin, they can dry out easily if left exposed.
Step 12: Serve
Your homemade rotis are now ready to be served! Enjoy them warm with your favorite sabji (vegetable dish), curries, or use them to make delicious rolls for lunchboxes. Rotis are very versatile and can be paired with a variety of Indian dishes.
Pro Tips
• Knead the dough until it's soft and pliable, not too soft or too hard.
• Use a little oil on your hands if the dough becomes sticky during kneading.
• Try to use minimal dry flour while rolling to prevent the rotis from becoming tough.
• If you are a beginner, use tongs to safely flip the rotis on the hot pan.
• Stack baked rotis on top of each other in an airtight container to keep them soft and prevent them from drying out.
Variations
• Rotis can be made without oil if desired.
• Experiment with mixing other flours like oat flour or quinoa flour with wheat flour for added nutrition.
• If using a gas stove, rotis can be puffed directly over the flame without a rack.
Storage & Leftovers
How to keep what you don't finish — pulled straight from the recipe.
- Store
Stack baked rotis on top of each other in an airtight container to keep them soft and prevent them from drying out.
- Store
Place it on a paper towel-lined basket or an airtight container with holes to allow steam to escape initially.
- Store
Continue stacking the rotis on top of each other in an airtight container.
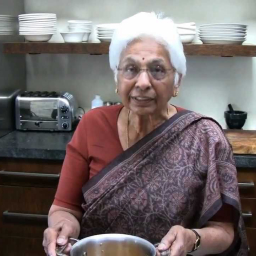
More from Bhavna's Kitchen
Other recipes converted from Bhavna's Kitchen's cooking videos.
Roti Making – Indian Flatbread
Cuisine
Indian · North Indian
Prep + Cook Time
45 Minutes
Difficulty Level
Easy
Roti Making – Indian Style
Cuisine
Indian · North Indian
Prep + Cook Time
40 Minutes
Difficulty Level
Medium
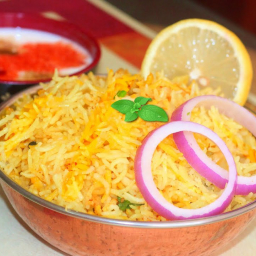
Plain Biryani – Indian Style
Cuisine
Indian · North Indian
Prep + Cook Time
35 Minutes
Difficulty Level
Easy
Soft Roti (Phulka) - Indian Flatbread
Cuisine
Indian · North Indian
Prep + Cook Time
35 Minutes
Difficulty Level
Medium
You might also like
Other recipes in the same cuisine, meal type, or style — ready to cook whenever you are.
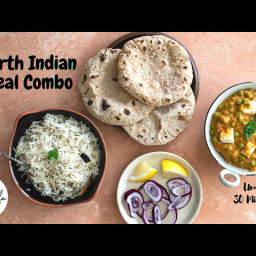
North Indian Meal Combo (Matar Paneer, Jeera Rice & Roti)
Cuisine
Indian · North Indian
Prep + Cook Time
3 hr 20 min
Difficulty Level
Medium
Indian Dahl with Prema (Love)
Cuisine
Indian · North Indian
Prep + Cook Time
40 Minutes
Difficulty Level
Easy
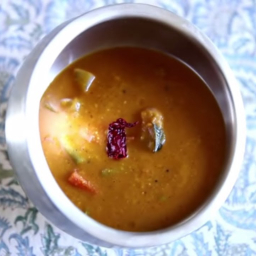
Huli Recipe - South Indian Lentil & Vegetable Stew
Cuisine
Indian · South Indian
Prep + Cook Time
50 Minutes
Difficulty Level
Medium
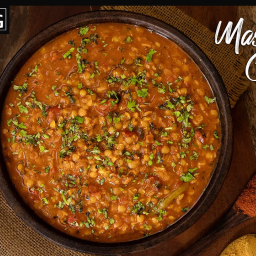
Masoor Dal Curry – Home Cooking
Cuisine
Indian · North Indian
Prep + Cook Time
1 hr 30 min
Difficulty Level
Easy

Drumstick Gravy (Murungakkai Kulambu)
Cuisine
Indian · South Indian
Prep + Cook Time
45 Minutes
Difficulty Level
Medium
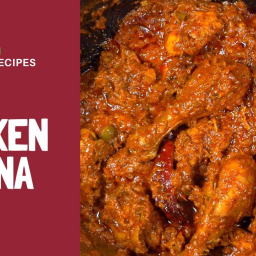
Chicken Bhuna – Indian Style
Cuisine
Indian · North Indian
Prep + Cook Time
1 hr
Difficulty Level
Comments
Sign in to leave a comment on this recipe.
Loading comments...