Roti Canai (Flaky Malaysian Flatbread)
Summary
- Roti Canai is a delicious, flaky flatbread popular in Malaysia and India, often served with curry. This recipe provides a crispy version, perfect for dipping in savory sauces or enjoying with sweet toppings like condensed milk or hazelnut spread. The dough is rested overnight to achieve its characteristic elasticity and flakiness.
All Ingredients - For the Dough
- All-purpose flour 2 cups
- Water (lukewarm) 1 cup
- Condensed milk 2 tbsp
- Salt ½ tbsp
- Butter (melted) 1.5 oz
- Egg 1 (optional)
All Ingredients - For Spreading and Cooking
- Vegetable oil as needed
- Butter (melted) 5 oz
Tools You'll Need
- Pan
- Grill
- Mixing bowl
- Rolling pin
Plan Ahead
Up to 30 min of hands-off time you can shift to earlier.
- Step 3 · Rest30 min
First Dough Rest Cover the dough and let it rest for 30 minutes. This resting period a…
- Step 7 · Overnight
Overnight Rest (Refrigeration) Cover the pan with cling film and a lid. Place t…
Don't have an ingredient? Try these swaps
No All-purpose flour?
- White whole wheat flour (1:1)
- 1 cup minus 2 tbsp + 2 tbsp cornstarch (cake flour swap)
No Butter?
- 3/4 the amount of olive oil (for cooking, not baking)
- Equal parts ghee — Slightly nuttier flavor.
- Equal parts coconut oil (in baking)
No Egg?
- 1 tbsp ground flax + 3 tbsp water (rest 5 min) — Per egg, best in baking.
- 1/4 cup unsweetened applesauce — Per egg, in sweet baked goods.
- 1/4 cup silken tofu, blended — Per egg.
⚠ Contains Allergens
Step-by-Step Instructions
Step 1: Prepare the Dough Mixture
In a mixing bowl, add 2 tablespoons of condensed milk, ½ tablespoon of salt, and 1 cup of lukewarm water. Mix until the condensed milk is fully diluted.
Step 2: Add Butter and Flour
Pour 1.5 oz of melted butter into the mixture and stir. Then, add 2 cups of all-purpose flour and mix thoroughly until a sticky dough forms.
Step 3: First Dough Rest
Cover the dough and for . This resting period allows the flour to absorb the water, making the dough easier to handle.
Step 4: Knead the Dough
After the first rest, the dough for . The dough will become soft and elastic.
Step 5: Divide and Shape
Divide the dough into 8 equal parts. Shape each part into a smooth ball.
Step 6: Oil the Dough Balls
Dip each dough ball completely in vegetable oil. This step prevents the surface of the dough from drying out. Place the oiled dough balls in a pan.
Step 7: Overnight Rest (Refrigeration)
Cover the pan with cling film and a lid. Place the pan in the fridge and let the dough rest overnight. This long rest is crucial for developing the gluten, making the dough very elastic and stretchable for the next day's preparation.
Step 8: Prepare Work Surface and Tools
The next day, take the dough out of the fridge. Prepare a small bowl of vegetable oil, 5 oz of melted butter, and a small rolling pin. Spread a generous amount of vegetable oil on your clean work surface.
Step 9: Flatten and Stretch the Dough
Take one dough ball and flatten it into a disk with your hands. Coat the disk with oil. Now, using both hands, lift one side of the dough and repeatedly throw it onto the work surface. This action stretches the dough, making it thinner and more elastic. Continue this process until the dough is stretched into a very thin, almost transparent sheet. You can also pull the edges gently to help it spread, applying a little more oil if needed.
Step 10: Apply Butter and Fold
Spread 1 tablespoon of the 5 oz melted butter evenly over the surface of the thin dough. Fold the two long sides of the dough towards the center to create a long, narrow strip.
Step 11: Roll into a Spiral
Starting from one end, roll up the long dough strip into a tight spiral. Tuck the loose end underneath the roll. Gently flatten the rolled dough slightly with your hands.
Step 12: Final Flattening with Roller
Using the small rolling pin, first spread the edges of the spiral outwards. Then, gradually roll from the center outwards until you achieve a thin, flat disk. Don't worry if there are a few small holes.
Step 13: Cook First Side
Place the flattened roti into a hot pan heated to medium heat. Let it grill for until lightly golden.
Step 14: Cook Second Side and Butter
Flip the roti over and cook for . Spread a little melted butter on the cooked side to enhance crispiness.
Step 15: Cook Third Side and Butter
Flip it over again and cook for another . Spread more melted butter on this newly cooked side.
Step 16: Final Cook
Flip the roti one last time and cook for until both sides are golden brown and the roti is flaky.
Step 17: Serve
Remove the Roti Canai from the pan. They are now ready to be enjoyed! Serve immediately with your choice of savory curry or sweet toppings.
Pro Tips
• Adding 1 egg to the dough (optional) will result in a softer texture for the roti.
• Resting the dough overnight in the fridge is crucial as it allows the gluten to unfold, making the dough very elastic and stretchable, which is essential for achieving thin, flaky layers.
• The thinner you stretch the dough, the more flaky the final roti will be.
• At the stage where the dough is rolled into a spiral and flattened, you can freeze them between two sheets of baking paper for later use.
Variations
• Serve with savory curry, as is traditional in Malaysia and India.
• Serve with condensed milk for a sweet breakfast or snack.
• Serve with hazelnut and cocoa spread for a dessert-like treat.
• For a more traditional version, replace butter with ghee (clarified butter).
You might also like
Other recipes in the same cuisine, meal type, or style — ready to cook whenever you are.
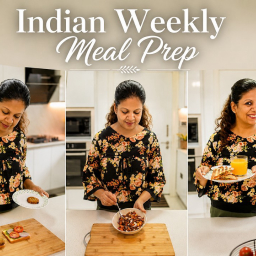
Weekly Meal Prep for Quick & Healthy Meals
Cuisine
Indian · Multi-regional Indian
Prep + Cook Time
2 hr 30 min
Difficulty Level
Medium

Korean Chicken Bao – Restaurant Style
Cuisine
Asian · Korean
Prep + Cook Time
1 hr 40 min
Difficulty Level
Medium
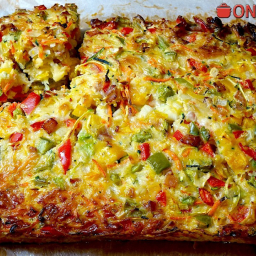
Rainbow Vegetable Egg and Bacon Slice – One Pot Chef Style
Cuisine
Australian · Breakfast/Brunch
Prep + Cook Time
1 hr 5 min
Difficulty Level
Easy
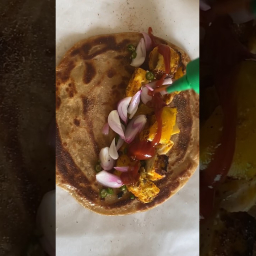
Paneer Kathi Roll
Cuisine
Indian · North Indian
Prep + Cook Time
30 Minutes
Difficulty Level
Medium
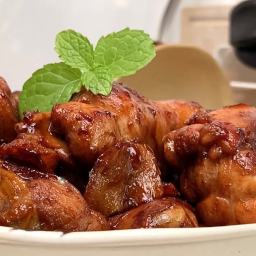
Sesame Oil Chicken - Chinese Style
Cuisine
Asian · Chinese
Prep + Cook Time
30 Minutes
Difficulty Level
Medium
Goli Idli (Mini Rice Flour Idli) - South Indian Style
Cuisine
Indian · South Indian
Prep + Cook Time
30 Minutes
Difficulty Level
Comments
Sign in to leave a comment on this recipe.
Loading comments...