Ready in

275 mins

Cuisine

Middle Eastern

Prep Time

30 min

Cook Time

5 min

Serving

40 pieces

Difficulty

Easy

Calories / Serving

~200 kcal
Recipe by My Food Secret on YouTube
Adjust Servings
Measurements
Tap an ingredient to mark it ready0 of 6 ready
All Ingredients

Halwa Ingredients

All Ingredients

For Coating

Step-by-Step Instructions

Follow each step to make the recipe successfully.

  1. Prepare Pistachios

    If using, cut the pistachios into small pieces and lightly fry them in a pan until slightly . Set aside.

  2. Sift Dry Ingredients

    Place a strainer over a large bowl. Sift the powdered sugar into the bowl, ensuring no lumps. Then, sift the milk powder into the same bowl.

  3. Mix Halwa Base

    Add the raw tahini to the bowl with the sifted sugar and milk powder. Mix all ingredients thoroughly by hand until a crumbly, dough-like texture is achieved. The mixture should hold together when squeezed.

  4. Mold the Halwa

    Take a silicone mold (or a small pan lined with plastic wrap) and lightly grease it with oil. Press the halwa mixture firmly into the molds, ensuring it's tightly packed. If using pistachios, mix them into the halwa mixture before molding.

  5. Chill Halwa

    Cover the mold or container with plastic wrap and refrigerate for at least , or until the halwa is firm.

  6. Melt Chocolates

    Melt the dark chocolate in the microwave for , stir, and microwave again for another until fully melted and smooth. Repeat the process for the white chocolate in a separate bowl.

  7. Prepare for Coating

    Take a baking pan and line it with parchment paper. Lightly grease the parchment paper to prevent sticking.

  8. Coat Halwa in Chocolate

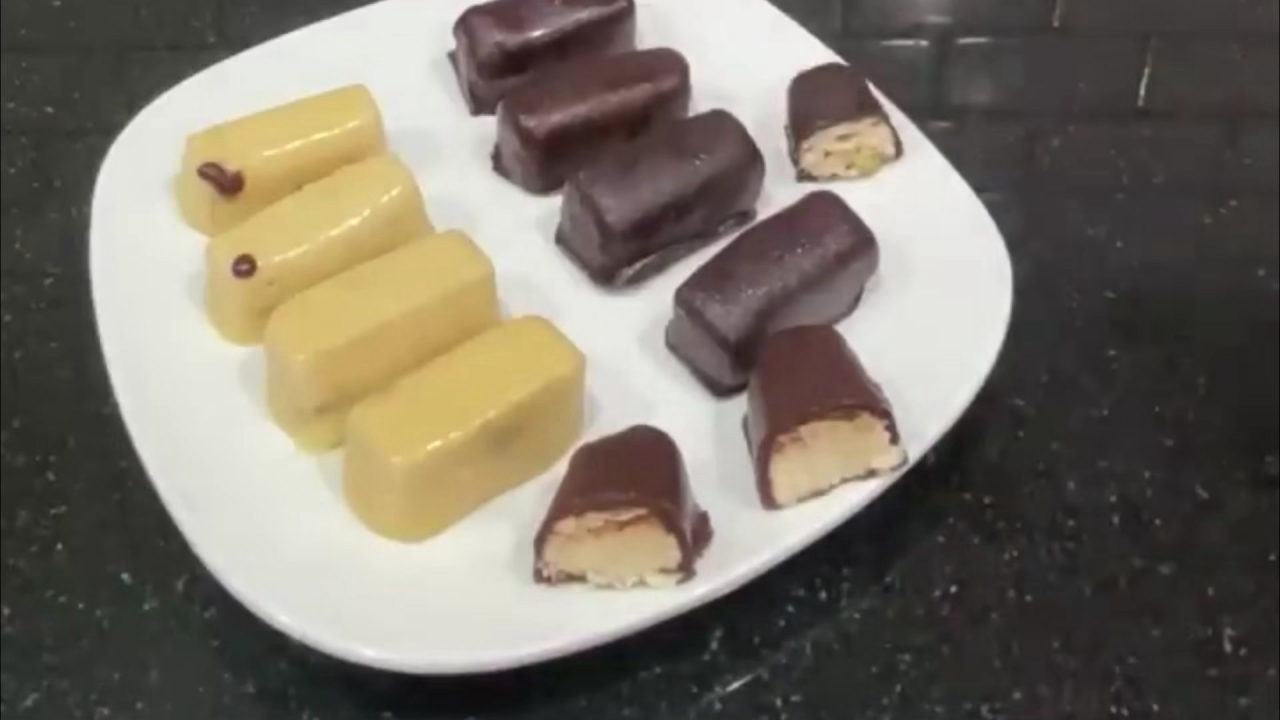
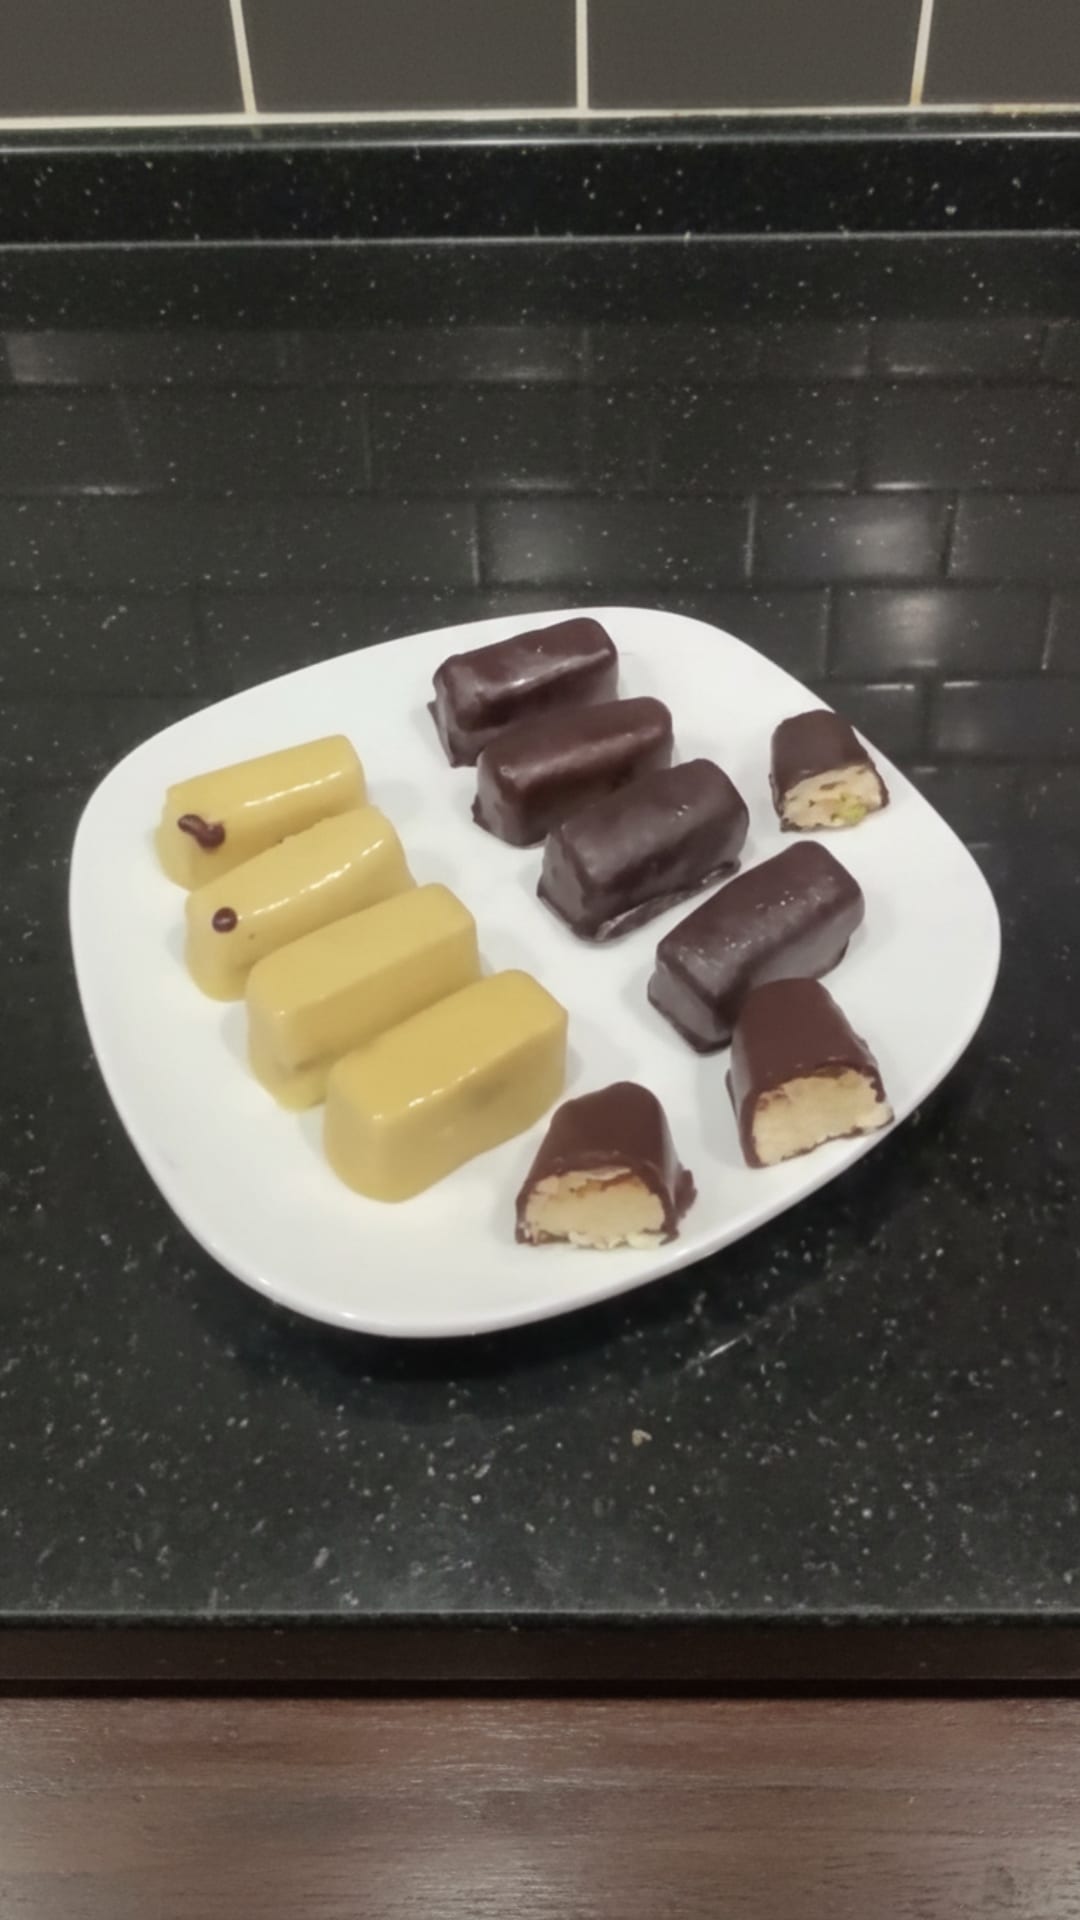
    Remove the chilled halwa pieces from the silicone mold. Dip each halwa piece into the melted dark chocolate, ensuring all sides are coated, then place on the prepared baking sheet. Repeat with the remaining halwa pieces, dipping them in the melted white chocolate.

  9. Final Touches and Serve

    Once the chocolate has set, carefully trim any excess chocolate from around the coated halwa pieces for a clean finish. Serve and enjoy your homemade halwa dessert.

Before You Cook

Helpful details before you start
Ingredient SubstitutionsMissing something? View suitable alternatives.
View 1 swap
  • No Milk?

    • Unsweetened almond / soy / oat milk (1:1)
    • 1/2 cup evaporated milk + 1/2 cup water (per 1 cup)
AllergensThis recipe contains dairy and nuts and sesame and soy.
DairyNutsSesameSoy

Plan Ahead

Complete this step earlier to save time later.

  • Chill Halwa4 hours

    Cover the mold or container with plastic wrap and refrigerate for at least 4 hours, or until the halwa is firm.

    View Step 5

Storage & Leftovers

Keep your leftovers fresh and ready to enjoy.

  • RefrigerateAt least 4 hours

    Refrigerate the halwa for at least 4 hours, or until firm, to ensure it holds its shape.

  • RefrigerateAt least 4 hours

    Cover the mold or container with plastic wrap and refrigerate for at least 4 hours, or until the halwa is firm.

Variations

Simple ways to adapt this recipe.

  • Use different types of nutsIngredient swap

    Use different types of nuts like almonds or walnuts instead of pistachios.

  • Experiment with different chocolate coatings

    Such as milk chocolate or flavored chocolates.

  • Add a pinch of cardamomCustomise

    Add a pinch of cardamom or vanilla extract to the halwa mixture for extra flavor.

Helpful Tips

Small details that can improve the final result.

  • TipEnsure Powdered Sugar and Milk

    Ensure powdered sugar and milk powder are sifted to avoid lumps.

  • Cooking tipMix the Halwa Ingredients Thoroughly Until a Cohesive

    Dough-like texture is formed.

  • TipLightly Oil the Silicone Mold

    Lightly oil the silicone mold or line the container with plastic wrap for easy removal.

  • TipRefrigerate the Halwa for at Least 4 Hours

    Or until firm, to ensure it holds its shape.

  • Cooking tipMelt Chocolate in Short Intervals (e

    G., 30 seconds) and stir in between to prevent burning.

Was this recipe helpful?

Cook with the app

Cook along with Sweet'n'Spicy

Make cooking easier with recipes right on your phone. Get the Sweet'n'Spicy app for iPhone and Android.

Comments (0)

Sign in to leave a comment on this recipe.

Loading comments...