Fullmeals.
HomeExplore RecipesPantry MatchSurprise MeShopping ListHow it Works
HomeExplore RecipesPantry MatchSurprise MeShopping ListMy FavoritesHow it Works

Have a Recipe Stuck Inside a Video?

Fullmeals pulls it out and turns it into a clean, step-by-step recipe you can actually use in your kitchen.

Gemini Convert a Youtube Video Now
Fullmeals.

Fullmeals helps you cook without watching by converting cooking videos into simple, step-by-step recipes designed for real kitchens.

Contact

Email
team@fullmeals.com
How it WorksCategoriesExplore RecipesRSS Feed
Legal
Terms of UsePrivacy Policy
© 2026 Fullmeals. All Rights Reserved.

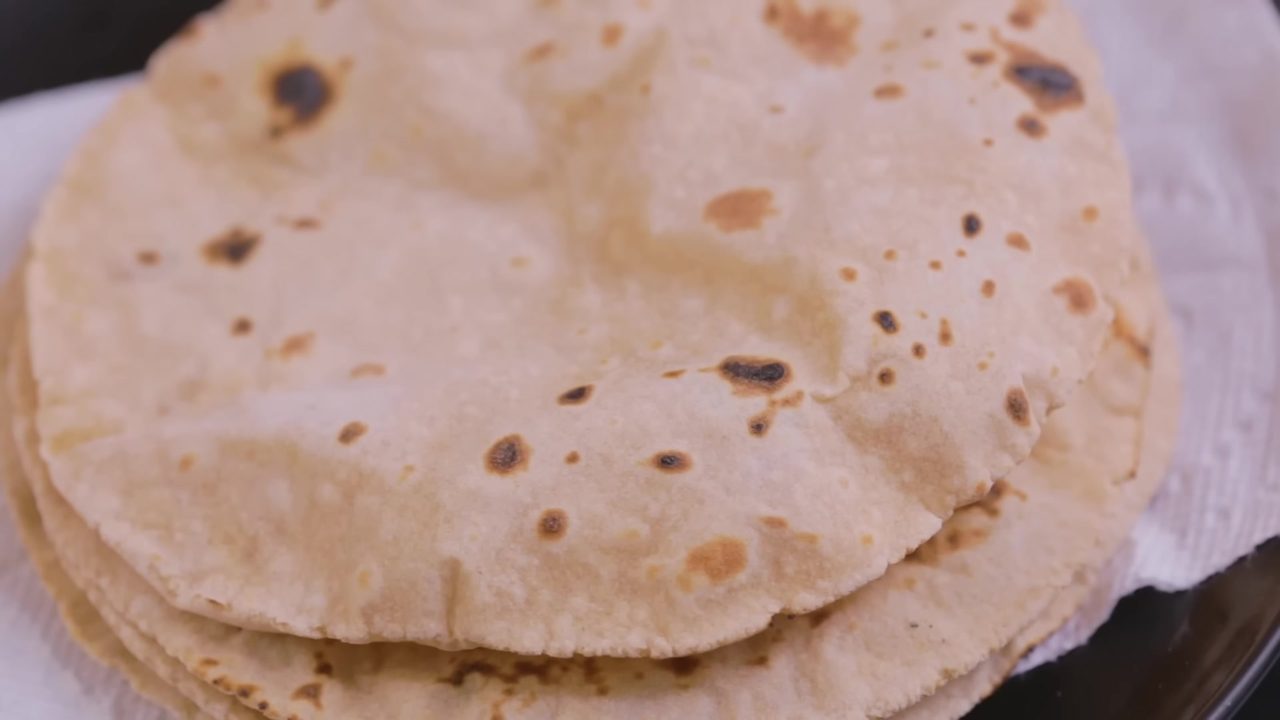
How to make Rooti (Roti) – Bengali Style

Ready in

35 mins

Cuisine

Indian · Bengali

Prep Time

25 min

Cook Time

10 min

Serving

4 People (makes 10 rootis)

Calories / Serving

~170 kcal
Recipe by Bong Eats on YouTube

Recipe Summary

  • This video provides a comprehensive guide to making soft and perfectly puffed rootis (chapattis or unleavened flatbread). It covers essential factors like dough hydration and temperature, kneading techniques, rolling methods, and cooking tips to achieve ideal results, ensuring your rootis are soft and puff easily.
Adjust servings
Tap an ingredient to mark it ready0 of 3 ready

All Ingredients - Main Ingredients

  1. Atta (whole-wheat flour) 200g
  2. Salt 4g
  3. Boiling hot water 185-190g

🍳Tools You'll Need

  • Pan
  • Skillet
  • Tawa
  • Mixing bowl
  • Bowl

⚠ Contains Allergens

gluten

Step-by-Step Instructions

Step 1: Combine Dry Ingredients

Add 200g whole-wheat flour (atta) and 4g salt to a mixing bowl.

Step 2: Add Hot Water

Pour 185-190g boiling hot water into the flour mixture.

Step 3: Initial Mixing

Initially mix the hot water and flour with a spoon until it's cool enough to touch, which takes about .

Step 4: Start Kneading

Once the atta is cool enough to touch, start kneading the dough. Use your knuckles to knead.

Step 5: Incorporate Moisture

To incorporate more moisture and achieve a soft dough, dip your knuckles in water and continue kneading.

Step 6: Achieve Smooth Dough

Knead the dough for approximately until it is smooth and crack-free.

Step 7: Rest the Dough

Cover the dough with a bowl and a towel and let it rest for .

Step 8: Divide the Dough

After resting, roll the dough into a log and divide it into 40g portions.

Step 9: Roll into Smooth Discs

Roll each portion into a smooth disc. The rounder and smoother the discs are now, the easier it will be to roll round rotis later. Keep the remaining discs covered to prevent drying.

Step 10: Dust and Flatten

Dust a dough disc in flour and flatten it slightly.

Step 11: Roll the Roti

Roll the dough disc into a round shape, about 16-18cm in diameter. Keep the disc rotating while rolling, using short, gentle strokes. Beginners can try keeping one hand fixed while rolling and applying slightly more pressure on one side, not the center.

Step 12: Dust Off Excess Flour

Dust off any excess flour from the rolled roti.

Step 13: Prepare the Pan

Heat a thick iron skillet (loha'r tawa) thoroughly over medium-high heat. A thick iron skillet is ideal as it can retain heat and cook evenly.

Step 14: Cook First Side

Once the tawa is completely hot, add a rolled roti. Wait until the wet spot on the roti recedes entirely, which takes approximately .

Step 15: Cook Second Side

When you see bubbles forming on the surface, turn the roti over and cook the other side for approximately .

Step 16: Puff the Roti

Place the partially cooked roti directly over a high flame to puff it up. Flip it once to ensure even puffing and cooking.

Step 17: Serve

Remove the puffed roti and place it on a plate, covering it to keep it soft.
Pro Tips

• Using boiling hot water denatures proteins, reducing gluten, which makes rotis soft without making them chewy or hard to tear.

• Boiling hot water allows the flour to absorb more water, leading to more steam and rotis that puff easily.

• Boiling hot water reduces kneading and resting time, and rotis stay soft much longer.

• Keep dough discs covered to prevent drying.

• To get a round shape, keep the disc rotating while rolling. Practiced roti-makers can do this with wrist movement; beginners must rotate manually.

• Roll in short, gentle strokes.

• Keep the disc well dusted to avoid pinching or sticking of dough; it should slide easily on the surface.

• Maintaining the correct heat level is key: too low heat will make the roti crisp like papad, while too high heat will develop burnt spots in some places and leave it wet in others.

• Sometimes, for various reasons, a roti will not puff; don't worry, it will still be soft.

Was this recipe helpful?

Comments

Sign in to leave a comment on this recipe.

Loading comments...

Favorite Recipes

Recently Generated Recipes

Discover recipes already generated from creators and ready to cook without testing your cred.

Matar Pulao (Peas Pulao) – Home Cooking
View Recipe

Matar Pulao (Peas Pulao) – Home Cooking

Cuisine

Indian · North Indian

Prep + Cook Time

25 Minutes

Difficulty Level

Easy

Dal (Daali Toy) – Mangalorean Style
View Recipe

Dal (Daali Toy) – Mangalorean Style

Cuisine

Indian · Mangalorean

Prep + Cook Time

30 Minutes

Difficulty Level

Easy

Tasty Carrot Curry / Poriyal / Palya / Stir Fry
View Recipe

Tasty Carrot Curry / Poriyal / Palya / Stir Fry

Cuisine

Indian · South Indian

Prep + Cook Time

40 Minutes

Difficulty Level

Easy

Andhra Style Veg Pulao – Home Cooking
View Recipe

Andhra Style Veg Pulao – Home Cooking

Cuisine

Indian · Andhra

Prep + Cook Time

50 Minutes

Difficulty Level

Medium

Rajma Curry (Kidney Bean Curry)
View Recipe

Rajma Curry (Kidney Bean Curry)

Cuisine

Indian · North Indian

Prep + Cook Time

45 Minutes

Difficulty Level

Medium

Home-style Chicken Curry – Indian
View Recipe

Home-style Chicken Curry – Indian

Cuisine

Indian · North Indian

Prep + Cook Time

1 hr 25 min

Difficulty Level

Medium