Garlic and Ginger Fried Chicken – Cantonese Style
Summary
- This recipe guides you through making crispy and delicious Cantonese-style garlic and ginger fried chicken. Chicken pieces are marinated overnight in a flavorful blend of garlic, ginger, soy sauce, oyster sauce, and spices, then double-fried for ultimate crispiness.
All Ingredients - For Marinade
- Chicken thighs and drumsticks 1.5 kg
- Crushed garlic and ginger 1 tablespoon
- Salt 1/2 teaspoon
- White pepper 1/4 teaspoon
- Sugar 5 teaspoons
- Chicken bouillon powder 1 teaspoon
- Oyster sauce 2 tablespoons
- Soy sauce 1 tablespoon
- Chinese rice wine 1 tablespoon
- Sesame oil 1 teaspoon
- Olive oil 1 tablespoon
- Egg 1 large
- Cornstarch 2 heaped teaspoons
All Ingredients - For Coating & Frying
- All-purpose flour 2 cups
- Cornstarch 1 heaped teaspoon
- Sunflower oil 1.5-2 liters
Tools You'll Need
- Wok
- Mixing bowl
- Bowl
- Whisk
- Strainer
Plan Ahead
Up to 3 hrs of hands-off time you can shift to earlier.
- Step 4 · Overnight3 hrs
…bowl and refrigerate the chicken for at least 3 hours, or preferably overnight, to allow flavors to absorb.
Don't have an ingredient? Try these swaps
No Garlic (fresh)?
- 1/4 tsp garlic powder (per clove)
- 1/2 tsp garlic granules (per clove)
No Soy sauce?
- Tamari (1:1) — Gluten-free option.
- Coconut aminos (1:1, milder & sweeter)
- Worcestershire sauce + a pinch of salt
No Egg?
- 1 tbsp ground flax + 3 tbsp water (rest 5 min) — Per egg, best in baking.
- 1/4 cup unsweetened applesauce — Per egg, in sweet baked goods.
- 1/4 cup silken tofu, blended — Per egg.
No Cornstarch?
- 2 tbsp all-purpose flour (per 1 tbsp cornstarch)
- Arrowroot powder (1:1)
- Tapioca starch (1:1)
No All-purpose flour?
- White whole wheat flour (1:1)
- 1 cup minus 2 tbsp + 2 tbsp cornstarch (cake flour swap)
⚠ Contains Allergens
Step-by-Step Instructions
Step 1: Prepare Chicken
Wash chicken thighs and drumsticks thoroughly. Cut chicken thighs in half and make a small slit near the bone to ensure even cooking. Repeat for drumsticks. Place the cleaned and cut chicken pieces into a large mixing bowl.
Step 2: Marinate Chicken (Dry Spices)
Add 1 tablespoon of crushed garlic and ginger to the chicken. Sprinkle 1/2 teaspoon of salt and 1/4 teaspoon of white pepper over the chicken. Add 5 teaspoons of sugar and 1 teaspoon of chicken bouillon powder. Mix all the dry spices thoroughly into the chicken using a spoon until each piece is well coated.
Step 3: Marinate Chicken (Wet Ingredients)
Drizzle 2 tablespoons of oyster sauce, 1 tablespoon of soy sauce, 1 tablespoon of Chinese rice wine, 1 teaspoon of sesame oil, and 1 tablespoon of olive oil over the chicken. Mix all the sauces into the chicken until every piece is evenly coated. Crack 1 large egg into the chicken mixture and mix well. The egg acts as a binder for the flour coating.
Step 4: Thicken Marinade & Refrigerate
Add 2 heaped teaspoons of cornstarch to the chicken and mix until the marinade thickens and coats the chicken well. This helps create a crispy coating. Cover the bowl and refrigerate the chicken for at least , or preferably overnight, to allow flavors to absorb.
Step 5: Prepare Coating Flour
In a separate bowl, combine 2 cups of all-purpose flour and 1 heaped teaspoon of cornstarch. to combine.
Step 6: Coat Chicken
Take the chicken out of the fridge. Using gloves, coat each chicken piece thoroughly with the flour mixture, pressing firmly to ensure the flour adheres well. Place coated chicken on a tray.
Step 7: First Fry
Heat 1.5-2 liters of sunflower oil in a wok over high heat until it reaches about 170-180°C (approximately 340°F) (340-355°F (approximately 170°C)). Test by dipping a chopstick; if bubbles form rapidly, the oil is ready. Carefully place the coated chicken pieces into the hot oil, one by one, ensuring not to overcrowd the wok. Fry the chicken for on high heat without moving it to allow a crust to form. Gently flip the chicken pieces and continue frying for another until they are lightly golden and a solid crust has formed. The bubbling will be vigorous due to water content. Remove the first batch of partially fried chicken from the oil using a spider strainer. The chicken will appear pale. Place them aside.
Step 8: Clean Oil & First Fry (Second Batch)
Use a fine-mesh sieve to clean any loose crumbs from the oil. Keep the heat on high. Repeat the first fry process (Step 7) for the remaining chicken pieces. Once all chicken pieces have undergone the first fry, clean the oil again with the sieve. Ensure the oil is very hot for the second fry.
Step 9: Second Fry
Return the first batch of chicken to the hot oil for the second fry. Fry for , moving the pieces around every , until they turn a beautiful golden brown and are extra crispy. The bubbling will subside as moisture evaporates. Remove the first batch of golden and crispy fried chicken from the oil and place them on a plate lined with paper towels to drain excess oil. Return the second batch of chicken to the hot oil for the second fry. Fry for , moving the pieces around, until golden brown and crispy. Remove the second batch of fried chicken from the oil.
Step 10: Serve
Plate the crispy garlic and ginger fried chicken and serve immediately.
Pro Tips
• Make slits in chicken pieces for faster and even cooking.
• Marinate chicken for at least 3 hours, preferably overnight, for maximum flavor absorption.
• Double-fry the chicken for extra crispiness.
• Maintain high heat during frying, especially for the second fry.
• Don't overcrowd the wok to ensure even cooking and crispiness.
• Clean the oil between batches to remove crumbs and maintain oil quality.
Variations
• Use hand-chopped garlic and ginger for a more authentic taste.
• Debone the chicken if preferred (though the video suggests keeping the bone for flavor).
• Adjust spice levels to personal preference.
Storage & Leftovers
How to keep what you don't finish — pulled straight from the recipe.
- Refrigerateup to 3 hours
Cover the bowl and refrigerate the chicken for at least 3 hours, or preferably overnight, to allow flavors to absorb.
You might also like
Other recipes in the same cuisine, meal type, or style — ready to cook whenever you are.
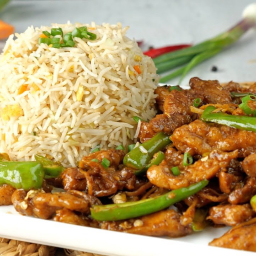
Chicken Chilli Dry with Fried Rice Recipe – Food Fusion
Cuisine
Asian · Chinese
Prep + Cook Time
50 Minutes
Difficulty Level
Medium

Homemade Raising Cane's Chicken Fingers, Texas Toast, and Cane's Sauce
Cuisine
American · Fast Food
Prep + Cook Time
3 hr
Difficulty Level
Medium
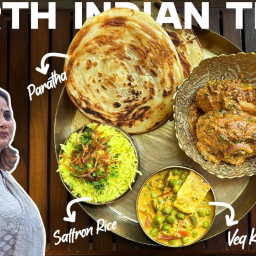
Veg-Nonveg Thali
Cuisine
Indian · North Indian
Prep + Cook Time
1 hr 30 min
Difficulty Level
Medium
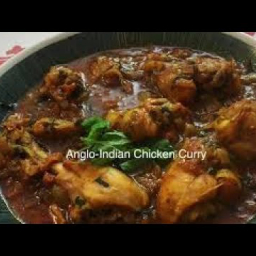
Anglo-Indian Bobo Curry or Chicken Curry
Cuisine
Indian · Anglo-Indian
Prep + Cook Time
35 Minutes
Difficulty Level
Easy
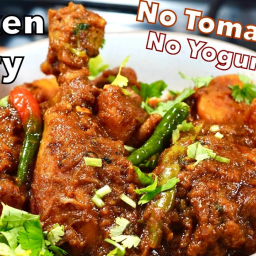
Easy Chicken Curry without Tomatoes or Yogurt
Cuisine
Indian · North Indian
Prep + Cook Time
1 hr
Difficulty Level
Medium
Wilton Restaurant: Culinary Journey through Wayanad, Kerala
Cuisine
Indian · Kerala, Malabar
Prep + Cook Time
—
Difficulty Level
Comments
Sign in to leave a comment on this recipe.
Loading comments...