Urad Dal and Rice Cheela with Vegetables
Recipe by Ritakitchenkr Channel
Ingredients
For the Batter
- 1 bowlUrad Dal
- 1 bowlRice
- 0.5 bowl (approx.)Water
- 0.5 tspSalt
- 0.5 tspRed Chili Powder
For the Vegetable Filling
- SomePeas
- Some, choppedTomato
- Some, shreddedCabbage
- 1-2 tbspOil
For Serving
- As neededCurd
- For garnishCoriander Leaves
- For garnishRed Chili Powder
Step-by-Step Instructions
- 1.Prepare Dal and Rice
Take 1 bowl of urad dal and 1 bowl of rice. Soak them overnight or for at least 5 hours until they are soft.
- 2.Blend the Batter
Drain the soaked dal and rice. Blend them into a smooth batter, adding approximately 0.5 bowl of water as needed to achieve a pourable consistency. The batter should be smooth and slightly thick.
- 3.Season the Batter
Add 0.5 teaspoon of salt and 0.5 teaspoon of red chili powder to the batter. Mix well until all ingredients are thoroughly combined.
- 4.Prepare Vegetable Filling
In a separate pan, heat 1-2 tablespoons of oil. Add chopped tomatoes, peas, and shredded cabbage. Stir-fry until the vegetables are slightly softened and their raw smell disappears. This step helps to remove the raw taste and adds flavor to the cheela.
- 5.Cook the First Cheela
Heat a non-stick pan on medium heat. Pour one ladleful of the prepared batter onto the pan. Gently tilt the pan to spread the batter evenly into a round shape. Immediately add a spoonful of the stir-fried vegetable filling on top of the wet batter.
- 6.Steam and Flip
Cover the pan with a lid and cook for 2-3 minutes on low heat until the edges start to crisp and the top looks set. Remove the lid, then carefully flip the cheela using a spatula. Cover again and cook for another 2-3 minutes until both sides are golden brown and cooked through.
- 7.Repeat for Remaining Cheelas
Remove the cooked cheela from the pan. Repeat the process for the remaining batter and vegetable filling, making sure to spread the batter and add vegetables for each new cheela.
- 8.Serve Hot
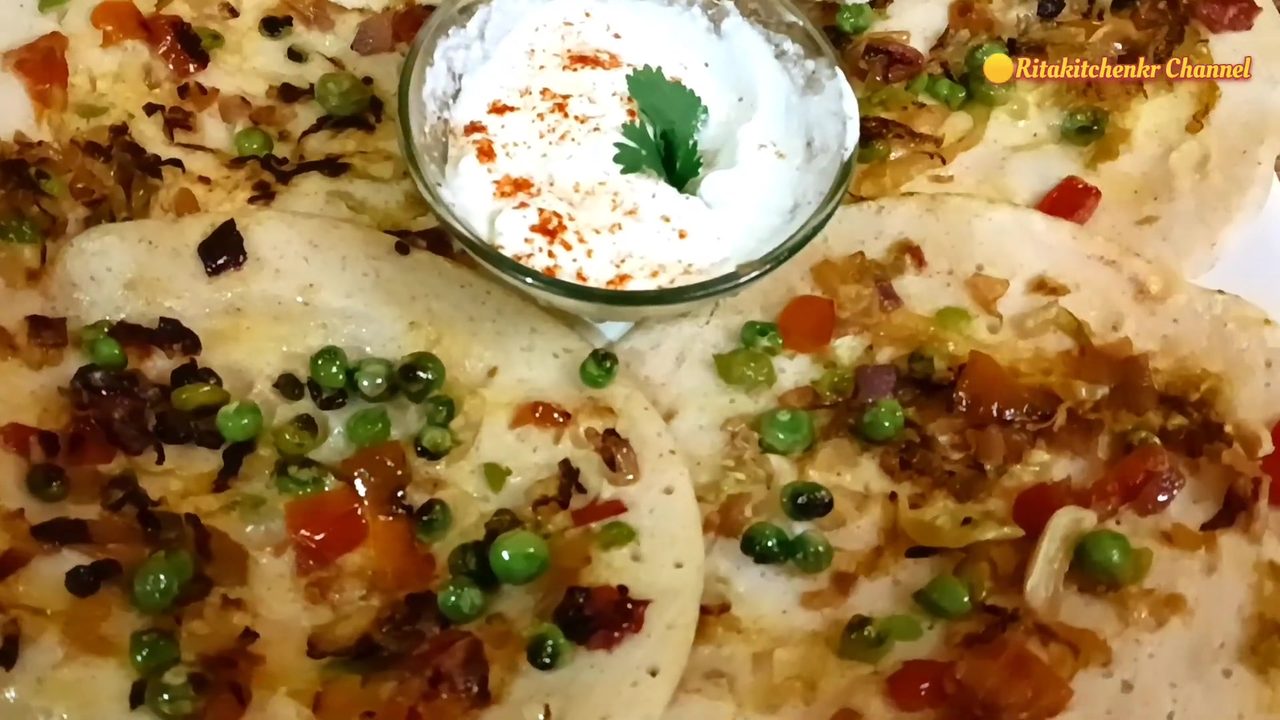
Once all cheelas are cooked, arrange them on a serving plate. Garnish with a dollop of curd, a sprinkle of red chili powder, and a fresh coriander leaf. Serve hot with curd, chutney, or your preferred accompaniment.



Comments (0)
Sign in to leave a comment on this recipe.
Loading comments...