Authentic Chicken Biryani - Dum Style
Summary
- A celebratory Indian dish featuring layers of fragrant, spiced rice and a rich, tender chicken gravy. The dish is slow-cooked in a sealed pot using the 'dum' method, which allows the flavors to meld together beautifully.
All Ingredients - For the Crispy Onions & Gravy Base
- Onions 2.5 large
- Neutral Oil or Ghee for frying
All Ingredients - For the Rice
- Basmati Rice 400g (approx. 2 cups)
- Chicken Stock or Water 600g (2.5 cups)
- Salt 6g (1 tsp)
- Green Cardamom Pods 6
- Star Anise 3
- Cloves 5
- Bay Leaves 4-5
- Mace Blades a few
- Turmeric Powder 1/2 tsp
- Ghee or Butter 1 tbsp
All Ingredients - For the Chicken Gravy
- Bone-in Chicken (thighs/drumsticks) 1 kg
- Ghee or Oil 2 tbsp
- Garam Masala 20g (4 tbsp)
- Green Cardamom Pods 6-10
- Cinnamon Sticks 1-2
- Dried Bay Leaves 4-6
- Fenugreek Seeds 1g (1/2 tsp)
- Mace Blades 2-3
- Kashmiri Chili Powder 2g (1 tsp)
- Ginger Garlic Paste 75g (5 tbsp)
- Chopped Tomatoes (tinned or fresh) 200g
- Tomato Paste 25g (1.5 tbsp)
- Full-fat Greek Yogurt 250g (1 cup)
- Double Cream 2 tbsp
- Cornstarch 1 tsp
- Salt to taste
- Sugar a touch
All Ingredients - For the Saffron Sauce & Layering
- Double Cream 120g (1/2 cup)
- Butter 60g (3 tbsp)
- Saffron Strands 3 large pinches
- Green Chilies a few, sliced
- Fresh Mint a handful
- Fresh Cilantro (Coriander) a handful
All Ingredients - For the Dough Seal (Optional)
- Regular Flour 350g (3 cups)
- Salt 3g (1/2 tsp)
- Water 250ml (1 cup)
- Oil or Ghee 15g (1 tbsp)
Tools You'll Need
- Pan
- Pot
- Oven
- Bowl
- Whisk
Plan Ahead
Up to 30 min of hands-off time you can shift to earlier.
- Step 3 · Soak30 min
…he water until it runs clear. Then, cover with fresh water and let it soak for 30 minutes.
Don't have an ingredient? Try these swaps
No Onion?
- 1 tbsp onion powder (per medium onion)
- 3 tbsp dried minced onion
- Shallots or leeks (1:1)
No Ghee?
- Unsalted butter (1:1)
- Neutral oil (1:1, lacks the toasted note)
No Bay leaf?
- 1/4 tsp dried thyme (per leaf)
- Pinch of dried oregano
No Butter?
- 3/4 the amount of olive oil (for cooking, not baking)
- Equal parts ghee — Slightly nuttier flavor.
- Equal parts coconut oil (in baking)
No Garam masala?
- 1 tsp cumin + 1/2 tsp coriander + 1/4 tsp cinnamon + 1/4 tsp cardamom
No Garlic (fresh)?
- 1/4 tsp garlic powder (per clove)
- 1/2 tsp garlic granules (per clove)
No Yogurt?
- Sour cream (1:1)
- Buttermilk (1:1, slightly thinner result)
No Heavy cream?
- 3/4 cup whole milk + 1/4 cup melted butter — Good for sauces, not whipping.
- Equal parts evaporated milk
- Full-fat coconut milk (1:1) — Adds mild coconut flavor.
No Cornstarch?
- 2 tbsp all-purpose flour (per 1 tbsp cornstarch)
- Arrowroot powder (1:1)
- Tapioca starch (1:1)
No Saffron?
- 1/4 tsp turmeric (color only, no flavor match)
- 1/2 tsp safflower threads
No Cilantro?
- Flat-leaf parsley (1:1, milder)
- Fresh mint (in chutneys, salads)
⚠ Contains Allergens
Step-by-Step Instructions
Step 1: Prepare the Onions
Finely chop 1 large onion and set aside for the gravy. Thinly slice 1.5 onions for frying.
Step 2: Make Crispy Fried Onions
Heat a generous amount of neutral oil or chicken fat in a pan over medium heat. Add the thinly sliced onions and fry, stirring continuously, until they are deep golden brown but not burnt. Drain on a paper towel and set aside. The resulting flavored oil can be used later.
Step 3: Prepare the Rice
Thoroughly wash the basmati rice, changing the water until it runs clear. Then, cover with fresh water and let it soak for .
Step 4: Make the Dough for Sealing (Optional)
In a bowl, mix 350g flour, 3g salt, 250ml water, and 15g oil or ghee. into a smooth dough. Cover with a damp cloth and set aside. This will be used to seal the pot for 'dum' cooking.
Step 5: Sear the Chicken
Heat a pan with ghee or oil. the chicken pieces until they are nice and golden brown on all sides. Remove from the pan and set aside.
Step 6: Cook the Gravy Base
In the same pan used for the chicken, fry the chopped onions with ghee/oil until softened. Add the whole spices (cardamom, cinnamon, bay leaves, fenugreek, mace) and fry for a few minutes to release their flavors. Once the onions are golden brown, add the ginger-garlic paste and cook until the raw smell is gone. Stir in the tomato paste and cook for one minute. Add the garam masala and chili powder, followed by the chopped tomatoes. for a few minutes, adding a splash of water if it becomes too pasty. Season with salt and a touch of sugar.
Step 7: Stabilize the Yogurt
In a separate bowl, place the full-fat Greek yogurt. To prevent it from splitting, in 2 tablespoons of double cream and 1 teaspoon of cornstarch until smooth and homogenous.
Step 8: Finish the Chicken Gravy
Remove the gravy base from the heat and let it cool slightly. Add the stabilized yogurt bit by bit, stirring it in completely. Return the pan to low heat, add the chicken back into the gravy, and slowly until the chicken is cooked through.
Step 9: Prepare the Saffron Sauce
In a small pot, combine the double cream, butter, and saffron strands. Bring to a and cook for until the sauce is beautifully golden and the saffron has bloomed. Set aside.
Step 10: Par-cook the Rice
Bring the chicken stock or water to a boil with salt, cardamom, star anise, cloves, bay leaves, mace, turmeric, and ghee. Add the soaked and drained rice. Give it a stir and boil for exactly . The rice should be partially cooked but still have a raw core. Immediately drain the rice, reserving the cooking liquid for other uses.
Step 11: Layer the Biryani
In a heavy-bottomed pot or a traditional clay pot (handi), start layering. Begin with a thin layer of saffron sauce, followed by a layer of par-cooked rice. Add sliced green chilies, torn fresh mint and cilantro, and a sprinkle of crispy fried onions. Add a layer of the cooked chicken and some of its gravy. Repeat with another layer of rice, saffron sauce, herbs, and onions. Finish with the remaining chicken and gravy, and top with a final layer of rice, saffron sauce, herbs, and a generous amount of crispy onions.
Step 12: Dum Cook the Biryani
Preheat your oven to 230°C (approximately 445°F) (446°F (approximately 230°C)). Seal the pot tightly. If using dough, roll it into a long rope and press it around the rim of the pot, then place the lid on top, pressing down to create an airtight seal. If using foil, cover the pot tightly with foil before putting on the lid. Bake in the oven for .
Step 13: Rest and Serve
Once cooked, carefully remove the pot from the oven. for . Break the seal and open the lid, being careful of the hot . Gently mix the layers from the side to combine. Serve hot, garnished with more fresh herbs and crispy onions. Enjoy with the freshly made flatbread.
Pro Tips
• To prevent yogurt from splitting, stabilize it with cream and cornstarch, and add it to the gravy base only after the base has cooled down slightly.
• Fry onions until they are deep golden brown but not black for the best flavor.
• If you don't want to make a dough seal, a tight layer of aluminum foil under the lid works as an alternative.
• The leftover liquid from par-cooking the rice is flavorful and can be used in soups or other curries.
• Using bone-in chicken like thighs or drumsticks results in a more flavorful and moist biryani compared to chicken breast.
Variations
• For a simpler version, you can skip the individual whole spices and use an extra tablespoon of garam masala.
• Boneless chicken thighs can be used instead of bone-in chicken.
• If you don't like it spicy, you can omit the green chilies.
Storage & Leftovers
How to keep what you don't finish — pulled straight from the recipe.
- Store
The leftover liquid from par-cooking the rice is flavorful and can be used in soups or other curries.
You might also like
Other recipes in the same cuisine, meal type, or style — ready to cook whenever you are.

Homestyle & Spicy Chicken Curry
Cuisine
Indian · Homestyle Indian
Prep + Cook Time
1 hr 25 min
Difficulty Level
Medium
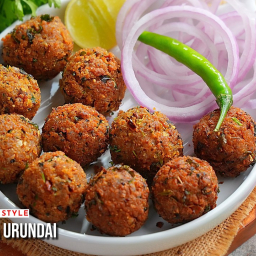
Mutton Kola Urundai – Chettinad Style Keema Balls
Cuisine
Indian · South Indian
Prep + Cook Time
50 Minutes
Difficulty Level
Medium
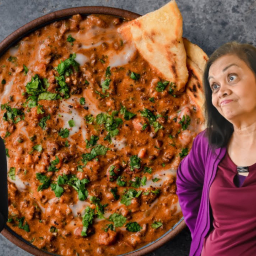
Making Vegan Dal Makhani
Cuisine
Indian · Punjabi
Prep + Cook Time
2 hr 30 min
Difficulty Level
Medium
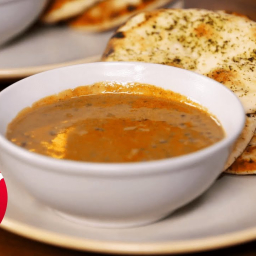
Dal Makhani – North Indian
Cuisine
Indian · North Indian
Prep + Cook Time
2 hr 35 min
Difficulty Level
Medium
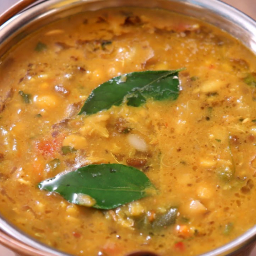
Dhabewali Dal – Dhaba Style Lentils
Cuisine
Indian · North Indian
Prep + Cook Time
45 Minutes
Difficulty Level
Medium
Paneer Kathi Roll
Cuisine
Indian · North Indian
Prep + Cook Time
30 Minutes
Difficulty Level
Comments
Sign in to leave a comment on this recipe.
Loading comments...